CAGE Plate Carrier Components
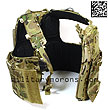
Front Plate Bag-
The CPC plate bags are made from 500D Cordura instead of the 1000D
of the Chassis and have some new features that enhance utility. The
front plate bag shown here is for a medium SAPI plate or stand-alone
plate. It is available for different plate sizes and will accommodate
most 'operator cut' plates. In case you are not using a stand-alone
plate, there's enough room in the plate bag to place a Level IIIA
soft insert behind the plate. In this case I have a CPC triple curve
plate with DBT Level IIIA insert behind it. The back of the plate
bag is lined with a semi-rigid sheet of polymer for shape retention
and also some protection from fragments. The medium SAPI plate bag
shown here is more rectangular than trapezoidal as not all 'operator
cut' plates have the same shape. The plate bag opens at the bottom
for insertion of the plate with a padded, Velcro-secured flap. There
is a pull tab in the middle of the flap which opens the flap and drops
the plate if it has to be ditched. The pull tab can be tucked away
inside the plate bag if that feature is not needed. The side panels
of the plate bag are made of a stretch-woven fabric. These allow the
plate bags to expand at the sides to provide a snug fit for the plate.
The front flap is lined with Velcro underneath, to which
the external cummerbund ends wrap around and attach. The front flap
doubles as an M4 magazine pouch, and can hold three thirty round magazines.
It will fit USGI mags, PMags and Tangodown ARC mags. The magazines
are separated by internal dividers, and elastic shock cord with pull
tabs are used for retention. I found the magazines secure enough inside
the slots that the elastic wasn't needed, so I undid the knots and
removed the shock cord. On the front of the flap are three rows and
six columns of PALS webbing. Above the flap is one more row to which
the shock cord retention for the mags is looped through. There is
a large loop Velcro surface inside the mag pocket that allows users
to adhere standard Velcro coins on mags for extrea retention. When
not in use, the top of the mag pockets are held shut by internal Velcro
and the pocket lays flat. When filled with mags, the sides of the
flap does pull away a bit from the Velcro under it since it's a flat
pocket that now has an item inside it. This does not affect the functionality
or security of the Velcro keeping the front flap secured.

|

Front flap mag slots and top admin pocket
|
There is a Velcro panel at the top of the plate bag
for patches/ID with two rows of Velcro-covered PALS webbing. There
are vertical and horizontal webbing loops on each side of the Velcro
field for mounting PTT communication accessories. Behind the Velcro
patch at the top of the plate bag is an administrative pocket with
internal elastic loops for retention of writing instruments etc. The
top of the pocket is closed with Velcro. It's 5" deep (4"
with the Velcro closed), so longer items might stick out of the top.
On the back side of the front plate bag are the shoulder
strap attach points at the top, and webbing for the Groin Panel. Since
the flanks are not armoured, they aren't as thick as on the Armoured
Chassis, so the front plate bag has a stand-off distance from the
user's body of about 1/2" to 3/4". Even though the lower
half of the front plate is supported from behind by the flank panels,
it has the stand-off distance at the top as well. If there's any back
face deformation from a hit, the standoff distance isolates the back
of the plate from the body over the sternum area. If the plate gets
hit where it overlaps the flank, the impact is distributed over a
larger area as the flank panels are quite rigid, unlike a soft panel,
which can deform in a smaller, localized area. With a conventional
plate carrier/vest, there isn't any standoff and the plate lies directly
on top of the soft panel, so any back face deformation can be transmitted
through the panel into the body. Vests with foam padding can help
reduce this.
Rear Plate Bag -
The 500D CPC rear plate bag fits standard SAPI or similarly-shaped
plates. The rear plate is inserted into the rear plate bag through
a bottom opening with a padded Velcro flap. There is a pull tab in
the middle for dropping the plate if necessary. Like the front plate
bag, the rear has a polymer liner inside it between the back of the
plate and the body. Instead of the rubber-covered drag handle of the
Armoured Chassis, a lighter weight webbing drag handle secures flat
with Velcro when not in use. While not as comfortable as the Chassis
drag handle, it presents a lower profile. The outside face of the
rear plate bag is covered in MultiCam PALS webbing and has a loop
Velcro field at the top of the bag. There is a heavy duty zipper on
either side of the plate bag for attachment of specialty rear-mounted
accessory panels. On the inside face of the rear plate bag, there
are three vertical rows of webbing - the outer two form the attach
points to the flanks and the center row houses the rear lacing system,
which is the same as that on the Chassis, as it's interchangeable
with the plate bag from the Chassis. The sides of the rear plate bag
are made of stretch-woven fabric, just like the front plate bag.
Flanks -
Like the Chassis, the side pieces (flanks) of the CPC are semi-rigid,
and molded/shaped to conform around the users body. The flanks enclose
non-removable plastic stiffening panels that provide the rigidity
and also a measure of protection from bumps and blunt impact on the
sides. The CPC flanks do not provide any ballistic protection, and
are therefore do not cover as much of the body as the Chassis flanks.
They are narrower in the back (they don't cover the upper back/deltoid)
and do not extend up the front of the chest. The Chassis flank looks
like a U-shape when flattened out, with the arm resting at the bottom
of the U. The CPC flank is L-shaped instead.
Having the side panels split in the front and back
allows the CPC to be donned and doffed like a regular front-opening
garment without having to put it over the head, and width adjustments
can be made by moving the panels closer or further apart from each
other in the back.
The front connection from the flank to the front plate
differs from that on the Chassis, but is still cross-compatible. On
each flank, there is a stiffened stabilizing tab. On the fixed side,
the tab captures the plate by folding back on itself and securing
down to the flank with Velcro. On the 'open' side, the tab slips through
the webbing on the inside of the front plate and supports it horizontally,
and is kept in place by the external cummerbund. As in the Chassis,
lateral adjustability is incorporated into the interface between the
flanks and the rear plate bag. Once adjusted, it's solid. The front
plate bag is also free to move laterally to a certain degree, relative
to the flanks.
The inside surfaces of the CPC flanks are lined with
soft, Velcro-compatible material, to which eight removable Custom
Fit pads are attached. Each flank has 4 removable pads - front, side
and two rear. Maximum thickness of the pads themselves are about .25"
uncompressed. The pads provide additional standoff from the armour,
which further insulates the user from impacts and blunt trauma, and
the air channels molded into them facilitate passive cooling, especially
when worn with the Crye Combat shirt. The pads are made of fabric-covered
closed cell foam with air channels molded into the surface, and can
be removed for washing. The user can choose to use or forego the pads,
depending on preference. The CPC pads are shaped differently than
the Chassis pads.
On each side of the flank is a pouch that will hold
an MBITR radio or two M4 30-round mag pouches. The contents are retained
by elastic shock cord (removable). To the rear of the flank pocket
are some strange-looking pockets with the openings at the bottom.
These are part of the StKSS system - more on that later.
Cummerbund -
On the Chassis, the cummerbund passes through a sleeve on each side,
called the cummerbund panel. On the CPC, the cummerbund does not pass
through a sleeve, but is external to the flank. Each flank has a cummerbund
sewn to the rear of the flank. The cummerbund wraps around the sides,
around to the front. There is no length adjustment of the cummerbund
as all girth adjustment is done by varying the space between the flanks
in the rear, and the overlap of the Velcro in front under the front
plate bag flap. The cummerbund has as compartment on the inside that
opens from the top, and houses the optional Crye Level IIIA insert
for users who want to add side ballistic protection. The pocket on
the medium cummerbund is approximately 12" x 6", and the
insert is 11" x 6". A 6" x 6" plate can also be
inserted, outside of the soft armour (for in-conjunction plates).
The cummerbund is lined with mesh.

Crye level IIIA side inserts |

|

|
Shoulders -
The CPC shoulder pads are lower profile than the Armoured Chassis
shoulders, as they do not contain the soft armour/ballistic inserts.
Like the Chassis, the CPC shoulders are modular and adjustable. They
comprise of the outer shell, nylon stiffening insert, and foam padding.
Adjustments and set up are basically identical to that on the Chassis.
The shoulders have an adjustable strap which can be pulled forward
to shorten it, drawing it closer to the rear plate bag. A proprietary
metal buckle is attached to the top of the flanks in the rear, through
which the shoulder adjustment straps is passed through. One of the
shoulders is attached to the front of the flank with a strap. The
other has a side-release buckle on the end, to which one side of the
front plate bag clicks into. The buckle strap can be installed on
either side or removed entirely for an 'over-the-head' donning setup.
I've switched it over to the right shoulder as I shoot primarily left-handed
off the left shoulder.
On the outside of each shoulder pad are two openable
Velcro loops for routing hydration tubes or communication cables.
The emergency doff handles are located to the inside of each shoulder.
The loops can be tucked further into the pad if desired. For added
protection and comfort, the CPC comes with a Shoulder Strap Adapter
which is used to adapt a CAGE Armoured shoulder piece to the CPC or
allow the user to have a non-padded (lowest possible profile) shoulder.

CPC shoulder pads |
Low
Profile Belt - The Low Profile Belt is essentially
a non-ballistic version of the Blast Belt, with some detail changes.
So, for folks who have been asking Crye to offer something like this,
your wish has been granted. It is more similar to the Gen I Blast
Belt as it doesn't have removable sleeves on the sides. It's also
not quite as tall in the back, as it is designed for load bearing
rather than ballistic protection. The Low Profile Belt consists of
the outer shell, and inner web belt, three removable comfort pads,
and the foam/stiffening insert.
The outer shell is made of 500D Cordura and has two
rows of PALS webbing on the side and rear sections. The PALS sections
form sleeves through which the inner belt is threaded. The rear section
forms a flap at the bottom which can be opened up to remove or install
the insert. Behind the PALS webbing on the sides, are slots which
are part of the StKSS system.
The inner web belt is made from 2" webbing and
has a plastic stiffener. A non-slip dual-adjust buckle is used - the
buckle prevents webbing slippage during movement, so the user doesn't
have to keep tightening the belt.
The comfort pads are fabric-covered foam and the insert
has a nylon stiffening sheet with foam. The stiffening sheet makes
the belt rigid, and it will not roll over under load. It's easily
the most supportive MOLLE war belt available. Crye will offer a ballistic
insert for users who want to use the Low Profile Belt with ballistic
protection, but it will have slightly less coverage in the rear as
the Blast Belt.
Structural Kinetic Support
System (StKSS) - Crye's new Structural Kinetic Support
System is one of those things that designers strive for - amazingly
simple, yet effective. Crye has found a way to distribute the load
effectively between the shoulders and the hips without adding any
kind of internal frame system, substantial weight or complexity. This
is made possible by the fact that the flanks are shaped/semi-rigid,
and are able to support the weight of the entire plate carrier by
acting as their own 'frame sheets'. This is not possible with other
systems that do not have the rigidity of the 'chassis' design.
The StKSS utilizes a rigid support on each side that
connects the CPC and the Low Profile Belt, with the ends captured
in corresponding pockets on both pieces of equipment. The supports
are manufactured in six different lengths. A sized kit consists of
two lengths of supports (a total of four) for a wide range if adjustment.
My medium CPC came with long and short supports as shown below. The
support is a lightweight, very rigid carbon fiber flat rod, enclosed
in webbing, with a retaining strap and snaps.
The top end with the single male snap is inserted into
the upside-down pocket on the CPC flank. The pocket has two mounting
locations; an upper and lower one. The support is inserted into either
one, then snapped in place to retain it. The Low Profile Belt has
slot pockets behind the PALS webbing that the supports slide into.
The retaining strap is woven through the PALS webbing to keep the
support anchored to the belt. The combination of different length
supports and the two flank pockets provides the range of adjustability
need for the user to find the correct combination to achieve the desired
offload. When the supports are captured at each end, they 'fix' the
distance between the CPC and the Low Profile Belt, just like a frame
on a pack does with the shoulder straps and hip belt. The distance
between the CPC and the hip belt is adjusted so that the supports
push up on the CPC and offload some of its weight onto the hips. The
belt should be centered on the hips, not around the waist, and be
adjusted so that the center line of the belt rests on the iliac crests
(hip bones).
The supports can be installed into the CPC, then inserted
into the belt after donning them separately, or leaving the CPC and
belt attached and the whole thing donned as a unit. When donned separately,
the supports are inserted into the belt by first leaning to the side
one way, then the other. The retaining strap is impossible to weave
through the top loop of PALS on the belt with one hand once the support
is inserted into the belt pocket, so it's usually left unsnapped.
There's very little chance of the support slipping up and out of the
belt as the pocket is deep. However, it can happen if the CPC is moving
up and the belt down during some sort of bouncing and twisting movement.
I did have one side pop out during drills that involved running and
moving into and out of different positions (including prone). I don't
know which exact movement caused it to pop out as I only noticed it
some time later, but I must have duplicated the conditions which enabled
the support to be inserted in the first place. Talking to Caleb about
this, he hadn't heard of it happening, but agreed that it was possible.
From feedback in the field, the preferred way was to keep the CPC
and belt attached, and don them as a single unit.
The StKSS can be retrofitted to the Chassis with a kit,
but it's not as elegant as solution as on the CPC as it's not built-in.

Supports
|

Support installed to flank pocket
|

Support installed in belt pocket
|

CPC and belt connected
|
How it all goes together:
Rear plate bag to flanks - The CPC
has essentially the same adjustable rear cord system and dual cut-away
system as the Armoured Chassis. At the rear of each flank is a hypalon
flap that folds inwards. The flap has cutouts through which a series
of eyelets, each with two holes, protrude. The eyelets are retained
under the flap by the emergency cut-away cord/cable, which has been
threaded through each of them. There are also two tabs on the back
of each flank; one at the top and the other at the bottom. These are
inserted through matching loops on the rear plate bag. Each tab has
a hypalon channel on the end which the cut-away cord passes through.
The rear cord is laced through the eyelets on both sides, and also
through the vertical webbing in the center of the rear plate bag.
Pulling downward on the lacing cord brings the rear of the flanks
closer together, closing the gap between them in the middle. On the
Chassis, the cord was 550 cord; on the CPC it is now thick elastic
shock cord to allow chest expansion and some 'give'. The Chassis achieves
this expansion by having an elastic front adjustment. The excess cord
is stashed in a pocket located behind the bottom edge of the rear
plate bag.
Emergency cut-away system - On the
end of each cut-away cable is a closed loop. The loops are Velcroed
to each shoulder pad for easy access. To release the CPC, a thumb
is inserted into either loop and the loop is pulled hard, forward
and out. As the loop is pulled away from the chassis, it releases
each of the eyelets and tabs holding one side of the rear plate bag
to the flank. The CPC will split along the back on one side, and fall
forward. Moving your body while pulling the cord helps the CPC fall
away. Note that when used with the StKSS, the CPC will not completely
separate if the supports are securely fastened to the belt. They have
to be unsnapped for successful vest separation.
Shoulders to flanks - The shoulder
pads connect to the top rear of the flanks, where a proprietary buckle
is located. This metal buckle is very low profile, and has a sliding
locking bar that prevents movement of webbing through it under tension.
At the top rear of each shoulder is a long length of webbing. This
webbing goes over the shoulder, passes through the metal buckle in
the back, and Velcros down on top of the shoulder pad. The webbing
connection from the top of the plate pocket Velcros to the shoulder
pad underneath the webbing strap. The shoulders are thus connected
in the front to the plate bag and in the back to the flank.
Front plate bag to shoulders - One
side of the plate bag is chosen to be the opening side for normal
donning/doffing, and the other is the fixed side. In my case, the
right shoulder is the fixed side.
Sewn to each top corner of the front plate bag is a short length of
webbing with a long wide Velcro tab on the end. On the right shoulder,
the male side-release buckle is installed and the Velcro tab folded
down and retained on the back side of the plate bag. On the left shoulder,
the Velcro tab is extended up and over the shoulder, where it mates
to the Velcro covering the shoulder. With this setup, the left side
of the front plate bag is semi-permanently attached to the left shoulder,
and the right other one has the quick-release buckle. As mentioned
before, the buckle can be removed entirely for an 'over-the-head'
donning setup.
Front plate bag to flanks - There is
stiffened 'stabilization tab' sewn to the outside front of each of
the flanks that folds back on itself, secured by Velcro. On the non-fixed
side, the tab slides through the loop on the inside of the front plate
bag and stabilizes the plate. It is not captured. On the fixed (non-releasable)
side, the tab passes through a loop on the back of the front plate
bag, folds around to the inside, and Velcros down to the lining. So,
the plate bag is 'fixed' at the top, and in the middle.
Cummerbund - The cummerbund wraps around
the sides from the rear of the flank to the front of the front plate
bag, and under the front flap. During normal use, the cummerbund is
detached only on the opening/releasable side; the fixed side is left
connected to the front of the plate bag.
Donning/doffing and initial
adjustment - The rear elastic cord adjustment is loosened
and the CPC is donned like any other break-front vest. The male buckle
on the front plate bag is attached to the female buckle on the shoulder,
then the stabilizing tab on the flank is inserted into the loop behind
the front plate. The front flap on the front plate bag is flipped
up, and each side of the cummerbund is pulled forward and wrapped
snugly to the front. The front flap is folded down over the cummerbund
ends and pressed firmly to secure the cummerbund.
The rear elastic adjustment cords are grabbed; one in each hand, and
pulled down and away from the body while taking a deep breath. This
is to ensure that it is not too snug when you inhale and your chest
expands. The loose ends of the cord are tucked inside a pocket at
the bottom inside of the rear plate bag.
The shoulders are then adjusted for CPC ride height. There should
be a nominal 1" or 2" gap between the bottom of the CPC
and the top of the Low Profile Belt. Once initial adjustments are
made, they don't have to be repeated every time the CPC is put on.
The custom fit pads can be installed or removed, depending on user
preference.
To adjust the StKSS, the supports are first installed
to the CPC, then to the corresponding slot on the Low Profile Belt.
The CPC is donned with the belt attached. The correct height is achieved
via the combination of support length and CPC mount. The supports
should be centered on the hips by adjusting their position fore or
aft on the Low Profile Belt. Correctly adjusted, a lot of the weight
of the CPC will be transferred from the shoulders directly to the
hips without pushing up the CPC off the shoulders.
Observations and notes
- For users who already use the CAGE Chassis, the CPC should be a
seamless transition, and even the differences are easy to figure out.
Like the CAGE Chassis, the CPC can look a bit complicated at first
glance to new users. It's actually a very straightforward design.
But to get to that point and figure out elegant solutions to design
requirements requires a lot of thought and ingenuity in the design
process; which is something Crye continues to deliver. Any complexity
in the construction or design is there to make it easier and more
comfortable for the end user. The CPC/StKSS user guide is clearly
illustrated and explains how to set up and adjust the CPC.
Donning the CPC takes about maybe 30 seconds, as the
front flap needs to be lifted up and one side of the cummerbund is
pulled forward and secured to the front of the front plate bag. This
is done after connecting the male buckle to the female one on the
shoulder. It's also easier to flip the front panel up when the internal
mag pouches are empty. Since the CPC rear cord is elastic, there's
some give, and this allows the CPC to expand with the torso when breathing
heavily or when seated.
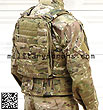
The CPC is shown below with the Low Profile Belt (note
that the StKSS is not installed). When compared to the CAGE Chassis
on the previous page, you can see that the CPC presents a lower front-back
profile.
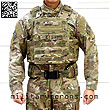
Note: StKSS not installed
|

|

|
|

|
Accessories
Shown below are some additional accessories that are
offered separately for the Armoured Chassis and CPC systems.The first
one is a lightweight 330D Cordura pouch that installs on the rear
plate bag, Blast Belt or Low Profile Belt. The attachment tab has
hook Velcro on one side and loop Velcro on the other, and attaches
between the belt pad and the inside of the belt. It has a Velcro-secured
flap closure and partially elasticized opening. It rolls up when not
in use and has a drainage grommet on the bottom.
Also shown are two zip-on panels
that attach to the rear plate bag of the CPC or Chassis. On each side
of the rear plate bag is a heavy duty YKK zipper, to which the panels
attach. On the rear of the panels are four straps that secure with
snaps, that further secure the panel to the PALS webbing on the plate
bag. Once attached, the panels are very secure, yet easily removable.
Using zip-on panels enables the user to quickly switch
between pre-configured rear pocket combinations without having to
mess with the individual pocket attachment systems. They're made of
500D Cordura for minimal weight. One panel is covered completely in
PALS webbing for the user to configure themselves. The other has a
sewn-on pocket configuration. At the top are six individual pockets
for mini-flash bangs or 40mm grenades (for access by a team mate).
In the center is a utility pocket with zipper closure. I found that
this will fit the Kangaroo hydration bladder from The Source. At the
bottom are three rows of PALS webbing. Both panels also have full
size compartments behind the PALS or sewn-on pockets, the size of
the panel. The compartment is closed in the middle with a Velcro tab,
and can be used for low-profile hydration bladders (usually 50 oz).
Breaching tools can also be carried in the compartment (they'll stick
out the top) so the bottom inside of the compartments are lined/reinforced
with tough Hypalon material.
A third available zip-on component not shown here is
a small pack with an expansion area for charges or longer breaching
tools.

Roll up pouch/bag
|

Attached at rear of belt |

Zip-on PALS panel
|

|

Zip-on panel with pockets
|

|
Wearing the CPC
- The CPC feels very much like the CAGE Chassis, but a bit more close-fitting
with a slimmer front to back profile. The plates sit closer to the
body and front-mounted pouches don't extend as far out. It is easy
to don and doff, and the semi-rigid flanks feel contoured to my body.
With the Level IIIA insert installed, the cummerbund support attached
pouches without sagging.
When setting up the CAGE Chassis, I preferred to install
the rear custom fit pads, and leave out the front and sides pads as
it was comfortable without them and I wanted the lowest profile possible
in front and the sides. With the CPC, I left all the pads in, as it
felt low profile enough. With the Level IIIA side insert installed,
the sides of the CPC are actually about 1/2" thicker than the
flanks of the Chassis with its integrated armour.
I found it more convenient to leave the Low Profile
Belt attached to the CPC via the supports, rather than separate them,
as I have no need to quick-ditch either. I played around with the
StKSS support height adjustments so that I could feel the majority
of the weight of the CPC on my shoulders reduced without noticeably
pushing it off my shoulders. The CPC is not supposed to be floating
around your ears.
At the Range
As with the CAGE Chassis, my goal at the range was
to get an initial/general feel for the CPC; overall comfort, mobility,
etc and see what changes, if any, I had to make to my shooting style.
I'm not someone who uses this gear for a living going in harm's way,
but I write from my limited point of view and experience in order
to (hopefully) provide useful information to those who might. I also
design gear so it's essential that I actually use it in any way possible
for me with different systems so any flaws in design and function
can surface.
The temperatures at the range varied from sunny in the
low 60's on one day to overcast and drizzly in the 50's on another.
The CPC was loaded up with six 30-round mags; three of which were
in the mag pocket in the front flap. I had removed the elastic retention
for the internal mag pockets as the magazines are quite secure in
there without it. I placed my Source Kangaroo reservoir in the zip-off
panel pouch on the back, and had an EMDOM Baby Shingle on the left
front. I tucked the valve of the hydration tube into the admin pocket
at the top of the front plate bag. I had a medium plate in front and
large plate in the rear with soft armour plate backers behind the
plates. I was also wearing the Crye Low Profile Belt with a couple
more 30-round mags in an EMDOM AK/M4 mag pouch, my EMDOM dump pouch,
four 9mm mags in an EMDOM 6o4 pouch, and my S&W M&P pistol
in Safariland holster. I was shooting my KAC rifle-length URX upper
with Trijicon TA44SR-10 1.5x ACOG attached to the CPC with my MM/EMDOM
URS Sling. I was wearing the Crye AC Combat Pants and a t-shirt, then
later the TAD Gear MultiCam Spectre Hoodie.
Comfort and Mobility
- Like the CAGE Chassis, the CPC is very comfortable and form fitting
on me. First, the combination of body-contoured panels and the padded
shoulders carry and distribute the loaded-up weight very well, even
without the StKSS. I adjusted the CPC the same way I wear the Chassis
so that it was a semi-snug fit - basically taking any 'play' out of
it without putting any undue pressure around my chest. In the photos
below, you can see the StKSS support between the bottom of the CPC
flank and the top of the Low Profile Belt on the sides.
StKSS - Although the StKSS supports
are rigid, and maintain a fixed distance between the points of attachment
on the flank and belt, the upper attach point on the flank allows
the support to pivot, and swing an arc; to follow the natural motion
of the torso with respect to the hips. The StKSS allows full twisting
motion of the upper body and bending at the waist. You could do the
Hula Hoop if you wanted, wearing this setup. Side bending range of
motion is very slightly restricted, as that is along the axis of the
supports, but the upper body can move inside the CPC enough to compensate
for that. Sitting isn't a problem; the CPC is just offloaded a bit
more in the seated position, but doesn't end up being pushed too high.
When I first saw that the StKSS consisted only of a
rod on each side, I was a bit skeptical. That skepticism evaporated
after I adjusted it for the correct offload and wore it at the range
for the first full day. The supports are extremely effective at offloading
weight from the shoulders to the hips. The CPC literally felt like
it didn't have plates in it. My hips barely noticed the weight being
transferred to them, as the Low Profile Belt was both comfortable
and positioned correctly on my hip bones. The difference is like wearing
a backpack that has no frame or hip belt, and one with a frame and
hip belt.
I thought that it was pretty amazing. And more amazing
was that it was so simple. The StKSS does not added any appreciable
weight nor bulk to the system yet makes a world of difference in reducing
fatigue on the trapezoidal muscles and upper/lower back/spine. At
the end of my range days, my shoulders and back didn't feel as fatigued
and tired. They normally ache a bit since I don't do this on a daily
basis; only occasionally, and my body doesn't ever get used to it.
Shooting - Shooting with the CPC mirrors
my previous experience with the Armoured Chassis. As with any other
plate carrier, the main challenge I've encountered is finding a place
to put the rifle butt. Placing it on the plate puts it out too far
for me, even with the stock fully collapsed, and then only the toe
of the stock is on it. Putting it on the shoulders puts it farther
outboard than I like. With both the CAGE Chassis and CPC, however,
I'm able to get a very comfortable and solid platform by placing my
stock with the toe hooked behind the front plate, and the butt resting
on the shoulder pad. This is enabled by the standoff gap behind the
front plate bag, something other plate carriers or systems don't have
(hence the issue). This places the stock just to the side of my chin
for my normal cheek weld.
I normally shoot my handgun using the isosceles stance,
with my elbows slightly bent. Some armoured vests are wide across
the top of the chest, between the shoulders and don't allow my arms
to come together enough to use my normal stance. The Chassis, with
its elastic cummerbunds, allow the flanks to move together when the
arms are extended forward. The CPC flanks don't extend as far up behind
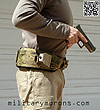
the front plate as the Chassis flanks, so it's a non issue. I'm able
to use my normal handgun stance/hold without restriction.
Shooting from different positions with the CPC isn't
much different from the Chassis, except that in some rollover positions,
there's less bulk on the rear of the shoulders. Other than that, it's
similar to other plate/armour carriers and prone positions will be
modified from shooting without armour to account for the additional
bulk.
Like Crye's CAGE Chassis, the CAGE Plate Carrier works
as an integrated system when combined with the other CAGE components
like the Low Profile Belt, and worn with the AC Combat Shirt and Pants.
They've been designed and tested to compliment and work with each
other, providing the war fighter with a combat uniform and armour
package that enables him to fight the enemy, not his equipment. The
new Structural Kinetic Support System built into the CPC and Low Profile
Belt provides another level of comfort for the war fighter above the
rest.
Note: the CPC and Low
Profile Belt and accessories will be rolled out publicly at the 2010
SHOT show. I do not have any information on availability or pricing,
so please contact Crye Precision AFTER Jan 2010 to inquire. As a rule
of thumb, they will be available for purchase when they are added
to Crye's website.


