CRYE PRECISION PAGE 1 PAGE 2 PAGE 3 PAGE 4 PAGE 5 PAGE 6 PAGE 7 PAGE 8
TO VIEW FULL SIZE IMAGES: USERNAME and PASSWORD are both "mm"
Crye Precision CAGE Armour Chassis
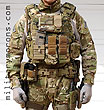
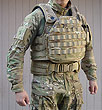
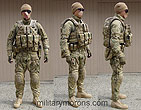
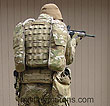
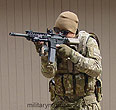
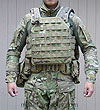
| 3/10/09 - This is the Crye Precision CAGE (Crye Assault GEar) Armour Chassis, which is the central component of the CAGE product line. The CAGE Chassis is an evolution of the original (Gen I) Armour Chassis that was arguably the most innovative ballistic vest design that most of us had ever seen when it was first introduced. With its distinctive tire-tread molded shoulder panels and Crye-shaped plates, it is still one of the most unique-looking pieces of body armour produced to date. The CAGE Chassis has a more conventional look from the outside at first glance, but actually retains much of the original Chassis's design heritage and features. The predecessor to the CAGE Chassis was seen at the 2007 SHOT Show, and is commonly referred to as the 'Gen 2 Chassis'. Note that there always have been numerous variants of the chassis, with only a few making it into the public eye. The CAGE Chassis is essentially the same as the Gen 2, with minor differences/updates. I wouldn't go so far as to call it a 'Gen 3', but more of a Gen 2.5. Anyways, Crye calls it the CAGE, so that's what it'll be. Overview - Just like the Gen I Crye Armoured Chassis, the CAGE Chassis aims to provide the soldier with the maximum amount of protection possible with today's existing material technology while still enabling him to perform his job without restricting his freedom of movement and mobility. It does this most effectively by being part of the CAGE system; and can be worn in conjunction with the Blast Belt or additional Extremity Armour (shoulders, biceps, fore-arm, groin and thigh armour) to provide an additional amount of protection for the user. The CAGE Chassis is a modular system, with interchangeable components that can be swapped out to customize the fit to the user, and to accommodate different types of plates. The level of ballistic protection can be specified by the user, but the typical package included with the CAGE Chassis includes ballistic flanks and shoulders which provide Level IIIA+fragment protection. Instead of the armour inserts being laminated and sewn into the flanks as on the Gen I, the CAGE Chassis utilizes proprietary shaped removable inserts in the flanks (like most other ballistic vests). This was done to allow the user to change chassis colours or to replace worn or damaged covers without having to purchase another set of ballistic panels. The inserts are not compatible with other armour systems. Front and rear plate bags are available for the Crye proprietary-shaped plates or standard SAPI plates, and have a stand-off from the body, just like the Gen I. The front and rear plate bags connect the left and right flanks on the sides. The CAGE Chassis is cut short - and ends right above the belly button. Worn in conjunction with the Crye Armoured Blast Belt, it allows complete freedom of motion when bending or sitting, while still providing ballistic protection at the waist and hip level. The CAGE Chassis is covered in MultiCam PALS webbing from Texcel Inc. for attachment of pouches. The CAGE Chassis has dual cutaway release pulls - pulling either one of two release cables will split the Chassis along the user's back and fall off forward. Chassis components come in S-XL sizes, and can be mixed and matched to fit a wide range of people. The CAGE Chassis is constructed mainly of 1000D Cordura with lighter weight materials used in non-structural and low-wear areas. It is produced at Crye's facility in New York. Like the Gen I Chassis, the main components that are assembled to form the CAGE Chassis are: Front plate bag/carrier, Rear plate bag, left/right flank/torso, and left/right shoulder pieces. Shown here is the Medium Chassis with Large SAPI plate bags. Note that the front and rear plate bags are sold separately and size independently from the Armour Chassis, to allow for a custom configuration. A plate bag set must be ordered to complete the chassis, and it will be shipped assembled.
|
| Chassis Components Front Plate Bag- The front plate bag shown is for a large SAPI plate or stand-alone plate. It is available for different plate sizes and the Crye proprietary-shaped plates. In case you are not using a stand-alone plate, there's enough room in the plate bag to place a Level IIIA soft insert behind the plate. The back of the plate bag is lined with a semi-rigid sheet of kydex for shape retention and also some protection from fragments. The large SAPI plate bag shown here is more rectangular than trapezoidal as not all 'operator cut' plates have the same shape. The plate bag opens at the bottom for insertion of the plate. There are two corner flaps which wrap around the bottom corners of the plate, protecting the corners and adding secondary retention should the Velcro flap come open. There is a flap with Velcro-closed slot pocket on the front of the plate bag.The flap is lined with Velcro underneath, to which the cummerbund ends wrap around and attach. The large SAPI plate bag has six rows of PALS webbing, three of which are on the front flap. It is six columns wide. There is a Velcro panel at the top of the plate bag for patches/ID. On the back side of the front plate bag are the shoulder strap attach points at the top, and webbing for the Groin Panel. Like on the Gen I Chassis, the front plate bag has a stand-off distance from the user's body of about 3/4" to 1" depending on whether the optional padding is used in the flanks. The front plate is almost completely supported from behind by the flank panels. There is only a small gap between the flanks in the center of the chest. If there's any back face deformation over the gap, the standoff distance isolates the back of the plate from the body over the sternum area. If the plate gets hit where it overlaps the flank, the impact is distributed over a larger area as the flank panels are quite rigid, unlike a soft panel, which can deform in a smaller, localized area. With a conventional plate carrier/vest, there isn't any standoff and the plate lies directly on top of the soft panel, so any back face deformation can be transmitted through the panel into the body. Vests with foam padding can help reduce this. Rear Plate Bag - The rear plate bag is also available to fit a Crye-shaped plate or a standard SAPI plate. The rear plate is inserted in to the rear plate bag through a bottom opening with a double secured padded Velcro flap. Like the front plate bag, the rear has a kydex liner inside it between the back of the plate and the body. The bottom corners are protected by additional flaps so no part of the plate is exposed. A drag handle is located at the top of the plate bag, and is covered with length of thick rubber tubing. This creates an easier handle to grab in a hurry, and is more comfortable on the hand than webbing alone. The outside face of the rear plate bag is covered in MultiCam PALS webbing and loop Velcro between the rows of webbing. There is a heavy duty zipper on either side of the plate bag for attachment of specialty rear-mounted accessory panels. On the inside face of the rear plate bag, there are three vertical rows of webbing - the outer two form the attach points to the flanks and the center row houses the rear lacing system, which is very similar to that on the Gen I Chassis. Ballistic Flanks - The side pieces (flanks) are semi-rigid, and molded/shaped to conform around the users body. The standard flanks provide Level IIIA+Frag ballistic protection. The main difference between the CAGE flanks and the Gen I flanks is that the ballistic inserts are now separate from the outer cover. On the Gen I Chassis, the ballistic material was sewn and laminated permanently to the cover fabric. Keeping them as separate components makes it easier to replace worn or damaged parts, or change the outer cover colour. The ballistic panels are inserted and removed through the Velcro-closed rear openings in the flanks. They are semi-rigid, and retain their shape. They're not soft or floppy and are able to support the weight of pouches mounted to the outer carrier. Each flank is shaped like a large U-shape, with the armpits sitting at the bottom of the U in the middle. By having the panels split in the front and back, this accomplishes three things: there is full side coverage with no overlap of the panels (like on most conventional armoured vests), it allows the Chassis to be donned and doffed like a regular front-opening garment without having to put it over the head, and width adjustments can be made by moving the panels closer or further apart from each other in the back. The areas between the split are covered by the plates, so there is no loss of coverage. You'll also notice that the flanks are wider in the rear and cover a lot of the upper back/rear deltoid. The front and rear of the flanks have provisions for the connections to the front and rear plate bags. As in the Gen I Chassis, lateral adjustability is incorporated into the interface between the flanks and the rear plate bag. Once adjusted, it's solid. The front plate bag is also free to move laterally, relative to the flanks. Stability of the front plate bag is achieved through the use of a cummerbund. The Gen I Chassis had no integral cummerbund; one was only available as an accessory. On the CAGE Chassis, the cummerbund is sewn down at the rear. There is no need for length adjustment of the cummerbund because all girth adjustment is done in the space between the flanks in the rear. The cummerbund passes through a sleeve on each side, called the cummerbund panel. The cummerbund panel has three rows of PALS webbing for attachment of pouches. A pouch can straddle the cummerbund sleeve and the cummerbund at the same time, as the pouch attachment strap can slide along the cummerbund PALS webbing, which has no vertical bar tacks. There is a pocket for a hard side plate inside the panel, behind the cummerbund. The rear portion of the cummerbund is elastic to allow the cummerbund to stretch slightly to accommodate the change in rib cage circumference when the user is breathing heavily. Horizontal webbing on the exposed portion of the cummerbund allow pouches to be attached. As on the Gen I, the inside surfaces of the flanks are lined with soft, Velcro-compatible material, to which removable Custom Fit pads are attached. Each flank has 3 removable pads - front, side and rear. Maximum thickness of the pads themselves are about .25" uncompressed. The pads provide additional standoff from the armour, which further insulates the user from impacts and blunt trauma, and the air channels molded into them facilitate passive cooling, especially when worn with the Crye Combat shirt. The pads are made of fabric-covered closed cell foam with air channels molded into the surface, and can be removed for washing. The user can choose to use or forego the pads, depending on preference. Modular Ballistic Shoulders - The distinctive molded stock lock on the Gen I Chassis shoulders is gone, but the CAGE Chassis shoulders are also armoured. The Gen I shoulder pieces were not adjustable, being of a fixed length. The CAGE shoulders are modular and adjustable. They comprise of the outer shell, soft armour insert, internal comfort pad and hard plate. They're wide to distribute load and provide ballistic protection. The shoulders have an adjustable strap which can be pulled forward to shorten it, drawing it closer to the rear of the Chassis. A proprietary buckle is attached to the top of the flanks in the rear, through which the shoulder adjustment straps is passed through. One of the shoulders is attached to the front of the flank with a strap. The other has a side-release buckle on the end, to which one side of the front plate bag clicks into. The buckle strap can be installed on either side - I've switched it over to the right shoulder as I shoot primarily left-handed off the left shoulder.
How it all goes together Rear plate bag to flanks - As in the Gen I Chassis, the CAGE Chassis has the adjustable rear cord system, and a dual cut-away system. At the rear of each flank is a hypalon flap that folds inwards. The flap has cutouts through which a series of eyelets, each with two holes, protrude. The eyelets are retained under the flap by the emergency cut-away cord/cable, which has been threaded through each of them. There are also two tabs on the back of each flank; one at the top and the other at the bottom. These are inserted through matching loops on the rear plate bag. Each tab has a hypalon channel on the end which the cut-away cord passes through. The rear cord is laced through the eyelets on both sides, and also through the vertical webbing in the center of the rear plate bag. Pulling downward on the lacing cord brings the rear of the flanks closer together, closing the gap between them in the middle. Emergency cut-away system - On the end of each cut-away cable is a closed loop. The loops are Velcroed to each shoulder for easy access. To release the Chassis, a thumb is inserted into either loop and the loop is pulled hard. As the loop is pulled away from the chassis, it releases each of the eyelets and tabs holding one side of the rear plate bag to the flank. The Chassis will split along the back on one side, and fall forward. Moving your body while pulling the cord helps the chassis fall away. Shoulders to flanks - The modular shoulders connect to the top rear of the flanks, where a proprietary buckle is located. This metal buckle is very low profile, and has a sliding locking bar that prevents movement of webbing through it under tension. At the top of each flank in front is a long length of webbing. This webbing goes over the shoulder, passes through the metal buckle in the back, and Velcros down on top of the shoulder pad. The shoulders are thus connected in the front and back to the flank pieces. Front plate bag to shoulders - One
side of the plate bag is chosen to be the opening side for normal
donning/doffing, and the other is the fixed side. In my case, the
right shoulder is the fixed side. Front plate bag to flanks - There is
a length of webbing sewn to the outside front of each of the flanks,
that wraps around to the inside, and Velcros down to the lining. On
the fixed (non-releasable) side, the webbing passes through a loop
on the back of the front plate bag. So, the plate bag is 'fixed' at
the top, and in the middle. Cummerbund - The cummerbund exits at the front of each cummerbund panel, and wraps around the front of the front plate bag under the front flap. During normal use, the cummerbund is detached only on the opening/releasable side; the fixed side is left Velcroed to the front of the plate bag. Donning/doffing and initial
adjustment - The rear lace adjustment is loosened
and the CAGE Chassis is donned like any other break-front vest. The
male buckle on the front plate bag is then attached to the female
buckle on the shoulder. The front flap on the front plate bag is flipped
up, and each side of the cummerbund is pulled forward and wrapped
snugly to the front. The front flap is folded down over the cummerbund
ends and pressed firmly to secure the cummerbund. There is a tab at
the bottom of the flap, which is snapped in place. Weight - Chassis weight depends on the threat package and plates, and is similar to the Gen I Chassis. Contact Crye directly for specifics. The Medium CAGE Chassis shown here with large SAPI plates weighs about 18 lbs, so that means the Chassis alone weighs about 9 lbs. Observations and notes - Like any unfamiliar system, the CAGE Chassis looked a bit complicated at first glance. Once I took a little more time to figure out how it all went together, everything became much simpler and logical. It's actually a very straightforward design. But to get to that point and figure out elegant solutions to design requirements requires a lot of thought and ingenuity in the design process. Like the Gen I Chassis, it's evident that a ton of thought went into the design of the CAGE Chassis. Any complexity in the construction or design is there to make it easier for the end user. The CAGE user guide is clearly illustrated and explains how to set up and adjust the Chassis. The split front and back design with proprietary shaped flank panels enables the CAGE Chassis to have a very low profile on the sides, since there is no overlap of ballistic panels; just a single layer. The internal cummerbund does not add any thickness to speak of, and has no buckles or straps since no adjustment is needed. Donning the CAGE Chassis takes just a bit longer (maybe 20 seconds) than the Gen I Chassis, as the front flap needs to be lifted up and one side of the cummerbund is pulled forward and secured to the front of the front plate bag. This is done after connecting the male buckle to the female one on the shoulder. If you have rifle mag pouches mounted to the front flap, it's easier to flip it up when the pouches are empty. On the Gen I Chassis, all the was needed was to engage the sliding plate hook onto the flank. The cummerbund does add stability and prevents the front plate bag from sliding from side to side. On the Gen I, the front plate bag could move from side to side a bit, as that was part of the front adjustment. Since the CAGE cummerbunds are partially elastic, there's some give, and this allows the Chassis to expand with the torso when breathing heavily or when seated. For illustrative purposes only (not as any kind of setup recommendation), the Chassis is shown below with the following equipment (I'm listing this because I usually get emails asking me this): EMDOM M4 pouches on the front, with an ITW FASTmag. EMDOM Admin panel on upper chest, EMDOM Baby shingle on left side, Eagle 1-qt canteen pouch with Source Kangaroo Bladder. Note that since the photos were taken, I realized that routing the drinking tube across the back prevented the emergency cut-away from working as designed, as the flanks separate from the rear plate bag. I have since shortened the drinking tube and routed it over the left shoulder. Crye Gen 2 Blast Belt with EMDOM/MM Battle Suspenders, EMDOM prototype duty belt, EMDOM 6o4 pistol mag pouch on right front hip, Safariland ALS holster on left side mounted to thigh platform, BlueForceGear Trauma Kit NOW! on left kidney, EMDOM/MM Dump pouch on right kidney, modified Tactical Tailor mini-thigh rig with two ITW FASTmags on right side.
Wearing the Chassis - The CAGE Chassis is easy to slip on, and feels similar to the Gen I Chassis when worn. The difference in feel between the Crye Chassis and other vests is that the Chassis is more contoured to the body, with the 'soft' armour not really 'soft', but semi-rigid. The semi-rigidity supports the attached pouches without sagging, and since the Chassis is curved, it feels like it conforms to your body like a pre-shaped/curved glove, rather than wrapping flat panels around you and trying to make them conform to your body contours. When setting up the CAGE Chassis, I preferred to install the rear custom fit pads, and leave out the front and sides pads as it was comfortable without them and I wanted the lowest profile possible in front and the sides. The weather is still cool, so it remains to be seen whether it's more comfortable further down the road in the summer heat with or without the pads. I had the recommended 1" to 2" gap between the Blast Belt and the bottom of the flanks, which enables full range of motion when bending, kneeling or squatting. My initial impression is very favourable, as expected. From the outside, the CAGE Chassis doesn't look as radical as the Gen I Chassis, or look much different from some other plate/armour carriers out there. But the difference is in the details - in the areas you don't see from the outside. The innovation, long hours of thought and attention to human engineering that went into the design of the CAGE Chassis are apparent when you dissect and examine the Chassis in detail, and even more so when you wear it. 4/6/09 - My goal at the range was to get an initial/general feel for the CAGE Chassis, overall comfort, mobility, etc and see what changes, if any, I had to make to my shooting style. I'm obviously not someone who uses this gear for a living, but I write from my limited point of view and experience in order to (hopefully) provide useful information to those who might. For this first range session with the CAGE Chassis, I also had the CAGE Shoulder Plates on hand, and the Ops-Core Bump Helmet. Obviously spending a few days now and then at the range does not equate long term, every day field use; but there are some things that you can learn in the first few hours of using a piece of equipment that don't change, and for others you can extrapolate. Other more subtle nuances will only become obvious after extended wear and I'll update this writeup with any new information or observations that I may have in the future. The temperature that day was in the mid 80's, which was very pleasant, but could get a bit warm after running around. The CAGE Chassis was loaded up with five 30-round mags, my Source Kangaroo reservoir on the back, and an admin pouch on the front. I had rigged the reservoir mouthpiece for hand-free drinking by attaching it to the front center of the front plate bag. It actually worked very well that day - all I had to do was bow my head and sip. Large SAPI plates with soft armour inserts behind the plates were carried in the front and rear plate bags. I was also wearing the Crye Blast Belt with a couple more 30-round mags on a thigh panel, my proto EMDOM dump pouch, TAD Recon pouch, four 9mm mags in EMDOM 6o4 pouch, and my S&W M&P pistol. I was shooting my painted Colt SP1 or LMT MRP attached to the CAGE with my MM/EMDOM URS Sling. Our shooting group had some new barricades, made by one of the members, and they challenged us to shoot from just about every position my old body could get into. I was wearing the Crye AC Combat Shirt and Pants. Comfort and Mobility - The CAGE Chassis is noticeably the most comfortable armoured vest/rig I've worn. First, it's the fit. The combination of body-contoured panels and the wide, padded shoulders carry and distribute the loaded-up weight very well. The rear lacing system and the elastic cummerbunds allow for fine tuning the distance between the flanks at the rear, and therefore how the shoulder pads sit on top of the shoulders. I adjusted the Chassis so that it was semi-snug - basically taking any 'play' out of it without putting any tension around my chest.
I was wearing the Chassis without the front and side Custom Fit pads, and felt quite comfortable without them. The second contributor to the comfort of the CAGE was the large air space behind the front and rear plates, between the left and right Ballistic Flanks. While I did get hot and sweaty (it was t-shirt weather, after all, and I was running about, and changing shooting positions), I didn't feel the 'get this thing off me!' urge during the entire day. Sure, I knew that I was carrying some weight, but it was well balanced and distributed without any flopping of pouches or anything else. The CAGE Chassis is short, which makes it a perfect design for my short torso. I can reach pouches on my waist; something I may not be able to do with longer rigs as they overlap my belt. The Blast Belt provides the ballistic coverage below the waistline while the gap between them acts as a point of articulation, allowing me to bend at the waist unencumbered. Shooting - One of the challenges I've encountered with wearing a vest with plates is finding a place to put the rifle butt. Placing it on the plate puts it out too far for me, even with the stock fully collapsed. Putting it on the shoulders puts it farther outboard than I like. With the CAGE Chassis, however, I was able to get a very comfortable and solid platform by placing my stock with the toe hooked behind the front plate, and the butt resting on the ballistic shoulder. This was enabled by the standoff gap behind the front plate bag, something other plate carriers or systems don't have (hence the issue). This puts the stock just to the side of my chin for my normal cheek weld. I normally shoot my handgun using the isosceles stance, with my elbows slightly bent. Some armoured vests are wide across the top of the chest, between the shoulders and don't allow my arms to come together enough to use my normal stance. The CAGE Chassis, with its elastic cummerbunds, allow the flanks to move together when the arms are extended forward. I was able to use my normal handgun stance/hold. Shooting from prone with plates and front-mounted gear with the CAGE poses the same challenge as with any other rig with a similar setup. I didn't expect it to be different, as bulk is bulk, and I just had to accommodate that with my firing position. I didn't find it uncomfortable, though, or that I was prevented from getting the rifle or my head low. When going prone, the Chassis did ride up a bit like other vests and the top of the rear plate would prevent my head from tilting back as it contacted the back of my helmet. When that happened, I just scooted forward a bit, allowing the Chassis to sit on my shoulders again, which took care of the issue. One of the reasons it rode up was because I left the Chassis semi-snug, instead of tightening it up more. I snugged up the rear laces some more later on and found it to be just as comfortable, and less likely to ride up when going prone.
Crye CAGE Shoulder Plates - One of the extremity armour accessories available for the Crye CAGE Chassis are the distinctive Shoulder Plates. The Crye Shoulder Plates are the first Level 3+ rifle protective plates designed specifically to fully cover the shoulder and exposed armhole region of the vest. Most vests now can accommodate side plates, but leave the armholes unprotected. Besides the molded shoulder stock locks on the Gen I Chassis, the Shoulder Plates were the other feature that gave the Crye Chassis its distinctive profile and unique look. The CAGE Shoulder Plates have a bit more of an angular shape than that seen on the earlier Gen I Chassis. The attachment straps are also different, but the CAGE Shoulder Plates can be used on the Gen I Chassis. The Shoulder Plates look like they might be bulky, floppy and restrictive, but they're actually not. The Shoulder Plates come in two sizes, medium and large (both shown here). The Shoulder Plates connect directly to the Armour Chassis and have no straps to restrict the biceps. A Plate assembly consists of an outer cover with covered zippered opening at the top, through which the hard plate is inserted. The outer cover has three straps sewn to it. The center one is 2" wide webbing with Velcro on the end, and wraps around the entire shoulder pad of the Chassis. It is weaved through a webbing loop at the top of the cover and secured to the Velcro strip on the outside of the cover. The other two straps are elastic with Velcro on the ends. They attach directly to the front and rear inside of the Chassis, which is lined with Velcro-compatible fabric. The straps are placed between the Chassis and Chassis pads (if they are used). A layer of pressure molded padding provides additional comfort on the underside of the cover.
The ceramic hard plate itself is dramatically shaped to accommodate the highly flexible nature of the shoulder joint and allow for maximum mobility. It is made by Ceradyne, Inc. The Medium Shoulder Plate weighs about 2.3 lbs each, while the Large weighs about 3 lbs each. They're both the same thickness; they just cover different size areas. I've tried to illustrate the difference in size and coverage between the two sizes in the photographs below. Both plates cover the outer deltoid while the large plate provides almost complete side coverage of the arm hole in the Chassis, and also extends lower for more upper arm side protection.
Shoulder Plate adjustment and notes - Attaching the Shoulder Plates to the CAGE Chassis is straightforward enough. Adjusting them so that they're in the optimal position is best done while spending some time with them on, and shooting from various positions. The elastic straps are infinitely adjustable since they're Velcroed to the inside of the Chassis flanks, and attaching them higher or lower, further in or further out on the Chassis body does make a lot of difference. Even with some slack in the elastic straps, the Shoulder Plates are very stable. I thought that they would flop about when moving and running, but the contrary was true. Since they're 'cupped', their natural position is to be centered on your shoulders, and move with the arms until restricted by the elastic straps. Adjusting the elastic straps so that the Shoulder Plates are tight against your shoulders when your arms are down isn't necessary, as they'll be under tension when you move your arms or lift them up. I started out with neutral tension in the straps, and also with them coming off front the plates horizontally. I then moved their location in and out (making them tighter and looser respectively), up or down, and also angling them slightly. I ended up having the straps with a bit of slack in them, when I'm standing with my arms at my side. The front strap was also attached a bit higher to allow me to raise my arms to the front (when shouldering a rifle or shooting a handgun) with less tension on the elastic. When I lift my arms or move them forward, I encounter some elastic resistance, but not to the point where my my range of motion is restricted. As you can see from the photos above and below, my arms have full range of motion. I shot from all the different positions I could think of, especially those on the ground, and I didn't feel that the shoulder plates prevented me from doing so. Medium or Large? Which to pick? They do feel a bit different. I hardly noticed the medium Shoulder Plates as they don't extend as low down my arm as the Large plates. When holding either in my hands, the difference in weight is noticeable; but when attached to the CAGE Chassis, I can't really tell. I did 'feel' the large shoulder plates more when I went into the different shooting positions, as the arm is pushing against them more when fully extended. The medium ones pretty much sit on the shoulders. The large plates do have more bulk, which is to be expected, but are still very unobtrusive. If max coverage/protection is more important than some weight savings and the little additional bulk is of little consequence, then the large plates are the obvious choice. Also, note that I'm not a big guy (5' 7", 155 lbs) - so the large plates will be smaller on a bigger fella. If you're smaller statured like me and want some weight savings and less bulk, then the mediums might be a better choice. Either way, the Crye Shoulder Plates provide a high level of protection for an often vulnerable part of the body, and a 'chink' in most armour systems. Crye's CAGE Chassis, combined with the other CAGE components like the Blast Belt and Shoulder Plates, and worn with the AC Combat Shirt and Pants, all function together as a system. They've been designed and tested to compliment and work with each other, providing the warfighter with a combat uniform and armour package that enables him to fight the enemy, not his equipment.
|
Crye Precision Armour Chassis (Gen I)
|
"And now for something completely different."
That famous line from Monty Python's Flying Circus should precede
Crye Precision's
Armoured Chassis every time it makes an appearance. However you describe
it - innovative, different, 'looks like a scorpion from behind', 'Starship
Trooper-ish' etc; the Chassis really IS quite different from anything
currently available, and I'll go out on a limb and say that it's the
most advanced and forward-thinking system yet. In a relatively short
time, Crye Precision has established itself as the military gear-design
and manufacturing company to keep an eye on. Overview - There are always pros and cons to the protection that the soldier wears to the battlefield. Personal protection is provided at the cost of mobility and weight. There's no easy way around it. The more protection that armour provides against bullets and shrapnel, the heavier and bulkier it becomes. The Crye Armoured Chassis aims to provide the soldier with a balance of the maximum amount of protection possible with today's existing material technology while still enabling the him to perform his job without restricting his freedom of movement and mobility. The main components that make up the Chassis are: Front plate carrier, Rear plate carrier, left/right flank/torso, and left/right shoulder pieces. The flanks and shoulders are made out of ballistic material, providing level IIIA+fragment protection (2 grain through 64 grain). Instead of an armoured carrier that holds soft armour inserts with plate pockets on the outside, the Crye Chassis IS the armour. Front and rear plate pockets hold Crye-proprietary shaped plates, and connect the left and right flanks. The Chassis is cut short - and ends right above the belly button. It is meant to be worn in conjunction with the Crye Armoured Belt (more on that later), and allows complete freedom of motion when bending or sitting, while still providing ballistic protection at the waist level. The Chassis is covered in PALS webbing for attachment of pouches. The Chassis has an emergency release system - pulling two release cables will dump the entire rig. Chassis components come in M-XL sizes, and can be mixed and matched to fit a wide range of people. The medium Chassis shown weighs about 8lbs, without plates.
|
| Accessory Cummerbund - If for some reason, side plate protection is desired, or a second layer of pouches, a cummerbund setup is available (similar to the one on the Eagle Industries MC-CIRAS vest). The left and right cummerbunds attach to the side of the flank using Crye's MOLLE-compatible system. Each cummerbund has a inside pouch that will fit a plate up to 6"x9" (usually 6"x6"). A front panel is attached to the front plate carrier which serves to wrap around the overlapping ends of the right and left cummerbund pieces. Each cummerbund is brought forward and the ends overlapped. The front panel then wraps over the ends, securing them, and the bottom of the panel wraps under the plate carrier and secures to the Velcro patch on the inside bottom. The left side cummerbund has to be released for the Chassis to be doffed.
A word about the Crye Molle-compatible system - Instead of horizontal strips of 1" webbing sewn on the back of pouches, a black Hypalon panel is sewn to the back of each pouch. Hypalon is a "reinforced flexible geomembrane with an exceptional service life. It is a synthetic rubber product manufactured by the calandar process into plies that are combined over a reinforcing polyester scrim fabric during manufacture." It's the same stuff used on Zodiac rubber boats and that Kifaru uses on their packs. Anyway, the Hypalon panel has slots in it every 1" through which the attachment strap weaves through, just as you would any other MOLLE compatible pouch. The end of the strap folds under and tucks into the Hypalon backing or the last row of webbing. It's lighter and just as secure as any MOLLE attachment method I've used. Crye Armoured "Blast Belt™' - The Crye Armoured Blast Belt is meant to be worn in conjunction with the Chassis to provide additional ballistic protection around the waist and hips (Level IIIA+fragmentation). Contoured and padded, it's extremely comfortable. It has the same non-removable ballistic material as the Chassis which gives it it's shape and rigidity. 2" wide webbing wraps around the entire belt, routed through the outer channel, to which the 2 rows of PALS webbing are sewn. The belt is lined with removable, closed-cell foam panels (2 side, 1 center back), which also provide some flotation. Weight of the belt is 2lb for Medium, 2.5lb for Large, and 2.75lbs for XLarge.
Worn alone, with dummy plates, the Chassis doesn't feel too restrictive, and the padding makes it more comfortable than some other vest's I've tried out. I'm able to shoulder my rifle and use a handgun without restriction of movement. The short cut of the Chassis makes it very easy to bend at the waist - something I felt was always a problem with longer rigs. I've a short torso, so that's also my fault. By sharing the torso and waist ballistic protection between the Chassis and the armoured belt leaves your waist free to articulate. The separate components all come in various sizes for a custom fit. The medium front and rear plate carriers and flanks, combined with the large shoulder pieces, fit me to a 'T'. The front and rear lacing system allow quick and simple adjustments and the ability to custom fit and loosen the fit of the Chassis at will. Kudos and thanks to Crye for an amazing design and the opportunity to preview it. Stay tuned for more. Additional accessories that are available are ballistic shoulder (covers the deltoids), groin and collar protection (all hold 6"x6" plates as well). The chassis will be available in several colours, but currently only MultiCam and Khaki are in production. Current production is for government sales only.
Since the Armoured belt sits on the hips, rather than higher up around
my waist, I'm able to utilize the space on the belt even with my shorter
torso. Usually, any rig I wear comes down too low and I can't access
belt-mounted pouches very easily. The combination of Chassis and Belt
allows the mounting of handgun on my hip and extra rifle mags on the
other side, without resorting to a thigh holster or subload thigh rig.
The 4 MLCS rifle mag pouches on the front plate don't feel like they're
any bulkier than my RAV with cummerbund. I didn't mount any pouches
on the side of the Chassis besides the small radio pouch as I can't
easily access pouches that high, and I don't like pouches under my arms.
|
Spent about 5 hours on the range - it was about 90° out there, and I went through 2 bottles of gatorade, a 1-qt canteen, and 70oz camelbak. To those people who think two hydration pouches on the Crye Chassis is overkill - it's NOT. Did pistol and carbine drills and also shot the SOTG M4 carbine qual course a couple of times (which requires you to shoot from standing, intermediate positions, and prone). BELT - I put a 'new' ITW front buckle on the armoured belt - the push-button in front one. I like the locking bar feature, but the buckle creaked when I moved. The belt is very comfy, and bears the load well (.45 Para P14.45 pistol, 2 double stack Para .45 mags, 2 M4 mags and pouches). I wore it sitting right on my hips, not high up around the waist. I noticed that there was a bit of slippage of the webbing, even with the locking bar buckle. It could be that the webbing 'works' it way through the buckle very slightly under constant movement. When used with the original side-release buckle, the webbing would work it's way looser. Maybe a slightly more coarse weave/textured of webbing (like the one you used for PALS webbing on the Chassis) would address slippage. As Gregg suggested, I wanted to pre-adjust it, and keep it there. Update (2/14/06) - I went back to the standard side-release buckle that the Blast Belt came with - the front push-button one would sometimes release while I was prone. CHASSIS - I wore the chassis pretty much the entire time, and it was
quite comfortable. I thought that slightly thinner chest pads might
be more comfortable, but that's just body-shape dependant. I didn't
run it without the pads. The plate standoff in front and back does aid
in cooling - I could feel airflow when I moved. The Combat shirt really
worked as claimed, in conjunction with the armour. The warmest part
of the whole outfit were the combat pants (remember it was 90°).
Having the side zippers really make a difference as I could ventilate
when I opened them up. I mounted only one 70oz camelbak on the left
rear of the Chassis, and didn't notice feeling off-balance. My rifle
was attached to the opposite shoudler in front, which probably helped
balance out the weight. |
| Gen 2 Blast Belt- Shown below is Crye Precision's Gen 2 Blast Belt. While it looks similar to the Gen 1 at a glance, it's got quite a few added features and modularity. The overall configuration is the same - it's a shaped/contoured battle belt providing level IIIA ballistic protection for the waist, and designed as a stand-alone item or for use in conjunction with the Crye Armoured Chassis. It is available in size S-XL.
On the Gen 1 Blast Belt, the removable internal 2" web belt was just a single thickness of webbing. The Gen 2 web belt is made of two layers of webbing that sandwich a plastic stiffener, like some pistol/duty belts, to prevent rollover of the belt when pouches or holsters are attached. It has hook Velcro on the loose ends to secure them to the loop Velcro sewn to the outside of the front of the belt. The web belt passes through the rear PALS panel, and two belt loops on either side. This was due to the request for standard belt for attachment of standard holster that did not have a MOLLE attachment. The web belt is tightened by pulling on the loose ends through the ITW QR buckle and securing them along the sides with their Velcro backing. The Gen 2 pads are removable, like the Gen 1, but are
lower profile. The back of the pad has hook Velcro, and the inside
of the blast belt is lined with loop Velcro fabric. Instead of the
ballistic insert being sewn into the blast belt and non-removable,
the Gen 2 blast belt is actually a removable cover/shell for the ballistic
insert. This modularity was added so the user can have multiple covers
in different camo patterns/colours and can switch covers from MultiCam
to Khaki while using the same ballistic insert. The rear PALS panel
wraps around the rear of the belt, and Velcroes at the bottom inside.
It is flipped open to expose the black ballistic insert. The panel
has a pocket for putting 6" x 6" plates inside to up the
armour protection level. Plates can also be slipped between the cover
and the ballistic insert on either side of the opening. To remove,
the ballistic is simply slipped out of the cover, as shown below.
It's rigid, and provides the belt with the support and shape.
Also available are simple suspenders for the Blast belt. They are in a Y configuration and the shoulder portion is 2" wide webbing. The shoulder straps meet in the back and connect to a vertical portion. The vertical portion is 2" wide elastic, with 1" seam tape webbing sewn in a 'ladder' with loose loops. This allows the elastic to stretch, but not overstretch, as the webbing flattens out and limits the amount of stretch. The ends are two 1" pieces of webbing, which wrap around the entire belt and pass through the PALS webbing. The 1" webbing in the front and back is supplied extra long and can be trimmed to size by the user. I just passed the loose ends through the triglides and tucked them back behind the belt. The suspenders are comfortable and low profile. As far as feel, the Gen 2 feels pretty much the same as the Gen 1, except I think the new lower profile padding is more comfortable. In the photos below, I've installed the MOLLE panel only on the right side, so you can see the difference.
|
| SAPI Plate Pockets- If you already have SAPI plates and you don't want to purchase the Crye-shaped plates for use with the chassis, Crye produces SAPI-shaped plate pockets. They're available to fit most sizes of SAPI plates (at least in medium and large). The SAPI plates aren't as well-contoured to the body as the Crye shaped ones, but they'll work just fine. Bear in mind that stand-alone plates must be used, or a Level IIIA insert placed in the pocket behind an in-conjunction plate.
Shown here are the pockets for the large sized SAPI plates. They're a direct replacement for the Crye-shaped pockets and aren't too difficult to switch out. The pockets have the Velcro-closed opening on the top, and don't have the snaps on the diagonals that the Crye ones do. You can compare the coverage of the large SAPIs to the Crye-shaped medium plates in the previous photos. The rear plate is wider at the bottom, but shorter than the Crye shape.
|
ATTENTION! PLEASE DO NOT LINK DIRECTLY TO MY IMAGES
-
IT RESULTS IN MY BANDWIDTH ALLOCATIONS BEING EXCEEDED,
AND MY PAGES GO DOWN. THANKS!
/ . PLEASE
OBSERVE AND RESPECT OUR COPYRIGHT! . /
©opyright by MilitaryMorons.com. All Rights Reserved. Reproduction, Duplication,
Distribution Strictly Prohibited.
Unless mentioned otherwise, content and images are the
property of militarymorons.com and are not in the public domain.
They are not to be used without
permission. Please Contact
me for permission to use any images or content herein.
