HOME
Pointman Other Products Zulu
Tailgunners Express
ZXR Koala/XRay
Woobie Pack
setup OTW
TO VIEW FULL SIZE IMAGES: USERNAME and PASSWORD are both "mm"
Kifaru Marauder Pack
Here are pics of my Kifaru Marauder pack, designed
as a "dedicated, low-profile assault pack for urban use and short-range
recon operations with modular capabilities". It's one of the first
5 that rolled off the production line :-) Kifaru makes the EMR, a 7500
ci monster, 3 mid-size packs (including the Marauder), and a smaller
lumber pack called the Scout. All of them have PALS webbing. Visit the
Kifaru website for more details on this pack and the rest of the Kifaru
military line here. I chose
the Marauder because I'm not a big fella, 5'7" and about 150-155
lbs. The Marauder is just the right size for daily use and short hikes,
and with the addition of modular pockets, I can more than double the
base pack capacity. I used it as a carry-on on an airplane and it fits
under the seat no prob. |
 Overall front view, .45 pistol for scale. The pack has 4 compression straps. |
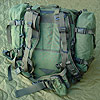
 Back view - the waist belt tucks into the pouch in the middle |
| The suspension system
consists of twin aluminum stays which are removable. The load can be
shifted completely to the waistbelt, as shown later. The two shoulder
straps are adjustable in length via their attachments at the top of
the pack. |
 Top access to the pack showing hydration pouch, tube route and removable twin aluminum stays |
 Lid/front panel has full length pocket for maps etc. |
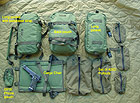
| Below are some of
the accessories available for all Kifaru packs. I got two long pockets
(650 ci each), and a back pouch (1050 ci) to expand my total capacity
to 4350 ci. What the hell does that mean in REAL volume? I took some
pics showing how mnay GI 1-qt canteens would fit in each pocket. I figured
that 1-qt canteens are of a universal size that every geardo can relate
to. See below. The pockets attach with a quick-disconnect 'dock and
lock' system which is very secure. They have their own cinch straps
with allow them to be collapsed flat if empty. I also got a cargo chair,
420d pullout set and a GPS/phone pouch which I mounted on the waist
belt. Using a shoulder strap, I can also use a long pocket as a shoulder
bag when detached from the main pack. The back pouch will easily hold
a Wiggy's Desert sleeping bag along with a Coolmax mummy liner. Box
(seam to seam lengths) dimensions of the back pouch are 14.5"x9"x4".
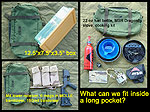
As a reference for what weird size objects the pouches can accomodate,
I was able to fit a box inside the back pouch with dimensions 10"x8"x5.75".
Dimensions of the long pocket are 15"x7"x3.5".
I was able to fit a box inside it with dimensions 11"x6"x6". |
 Some of the available accessories |
 Two long pockets attached to the sides and the back pouch in the middle. |
 Back view |
 Long pocket disengaged partially |
 What other kind of stuff can you fit into a long pocket? Here are some examples. |
 And here are some things that will fit in a back pouch |
| The cargo chair (below)
attaches to the bottom of the pack and allows large, awkward loads to
be strapped in and carried. It can also be used to carry a person. I
carried my wife around for a bit in it but she refused to be photographed
in the chair. Numerous tie-down points are provided on the pack for
attachment of lashing straps. |
| Wearing the pack -
the pack is donned like any other backpack initally. The shoulder straps
are snugged and then the waist belt. The waistbelt delta strap is then
tightened, followed by the side deltas. The side delta straps pull the
pack into the back, and prevent it from flopping over backwards. The
top shoulder adjustment straps are then tightened to pull the top of
the pack up and in a bit. The pictures below show the pack and pouches
stuffed with soft items for illustration. |
 Front view |
 Side view |
 Back view |
 Shoulder straps disconnected - pack stays put |
| Someone on AW pointed
out that the above picture on the far right didn't say much since the
pack wasn't loaded with real weight. Of course it'd stay up with no
weight in it. I agreed with that observation so I put a case of .223
(1000 rounds) in the pack, along with a sleeping bag in the bottom to
keep the weight towards the top of the pack. The case of .223 weighs
approximately 35 lbs. I donned the pack and disconnected the shoulder
straps. As you can see below, the pack sags very slightly from the weight,
but still stays up with all the weight taken up by the waist belt and
delta straps. |
 1000 rnd case of .223 (35 lbs) and a sleeping bag as filler |
 Shoulder straps dsconnected |
 Back view, no shoudler straps |
Top Compression Strap Modification
| Some time ago, I added
some top compression straps to the top of my Marauder, like the RAID
pack or TT 3-day packs have, which enable me to cinch up the top of
the marauder and give the front panel a bit of vertical support, drawing
it slightly higher to the top of the pack. It also adds a bit of security
to the zipper. I can also stuff a small jacket or roll under the straps
and carry it on top of the pack. By request, I've shown it here. It's a simple addition, and can be added or taken off without alteration to the pack. Basically, a quik-attach female buckle is attached to the upper common loop (cargo chair attach point). Then I cut a slot in the middle bar of a regular 1" triglide so I could slip it onto the common loop at the top front of the panel. I folded over the end of a length of 1" webbing and sewed it down to prevent it from slipping through the triglide, and finished off the other end. I then installed a regular male buckle on it and attached the assembly to the triglide. I saw that eggroll had done the same thing to his marauder independently - great minds think alike :-) |
 Modified compression straps cinched up |
 Buckles released |
 Detail view |
|
Kifaru - 1/5/05 - Kifaru's new Marauder in Crye MultiCam is shown below. (Actually, it's a prototype that was built with less rows of PALS webbing, so as not to obscure the multicam pattern when no pockets are attached. ) Major changes made from the original Marauder are 25% more internal volume, 1" aluminum stays instead of 3/4" stays, seperate/optional Omni belt system (same as the Zulu), shoulder strap take-off points lowered. The sides now have 4 columns of PALS instead of 3, and top/bottom compression straps have been added. The new hybrid long pocket give the user the choice of both the dock and lock system and malice clips for attachment (far right photo). It's also a top zip instead of side-opening zipper. Also, instead of having full PALS webbing on the outside of the pack, this one was built with less rows, so as not to obscure the multicam pattern when no pockets are attached.
These pics were taken just to illustrate the pack and Crye Field uniform in the outdoors. Mounted to the Marauder are a back pouch, standard and hybrid long/side pockets. 1/16/05 - The issue of PALS webbing covering up half the camouflage pattern on a pack has been brought up. It's probably not an issue practically, for those who REALLY need camouflage, but maybe one aesthetically. One rainy weekend I was bored, and had time on my hands, so it thought "Huh. Wonder if I can paint the webbing to blend in better with the Multicam pattern?". I started out with some spray paint on the webbing, and it looked okay, but I thought that I could make it look better, so I decided to ty to duplicate the pattern with paint and a brush. I used acrylic paints (waterproof when dry), which I mixed to match the multicam colours, and just tried to follow the pattern under the webbing as best I could. I'm pretty pleased with how it turned out.
|
Check out the Pointman on the next page-->
ATTENTION! PLEASE DO NOT LINK DIRECTLY TO MY IMAGES
-
IT RESULTS IN MY BANDWIDTH ALLOCATIONS BEING EXCEEDED,
AND MY PAGES GO DOWN. THANKS!
/ . PLEASE
OBSERVE AND RESPECT OUR COPYRIGHT! . /
©opyright by MilitaryMorons.com. All Rights Reserved. Reproduction,
Duplication, Distribution Strictly Prohibited.
Unless mentioned otherwise, content and images are
the property of militarymorons.com and are not in the public domain.
They are not to be used without
permission. Please Contact
me for permission to use any images or content herein.


