1st Line Gear Page 1
Page 2
Page 3 Page
4
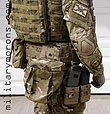
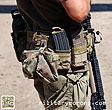
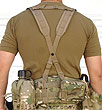
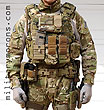
1st line gear usually consists of the bare essentials:
what's carried in your BDU pockets and belt kit (pistol, spare mags, survival
equipment).
TO VIEW FULL SIZE IMAGES: USERNAME and PASSWORD are both "mm"
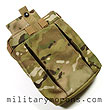
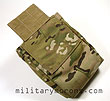
| 6/7/09 - The EMDOM USA/MM Dump Pouch is a medium sized, non-folding dump pouch designed for the user who needs a dedicated spent mag or utility dump pouch without the need to fold it up. For the past 5 years, I've been using my original Reccegear/MM Dump pouch in MultiCam or MAXPEDITION Rollypoly (MM Folding Dump Pouch) on all my rigs and they've served me extremely well. The only complaint I had with the Rollypoly was that it was never available in Crye MultiCam. It'd often be the only thing that wasn't in MultiCam on my rigs. I'd asked MAXPEDITION for years to make them in MultiCam, but they never did. So, out of desperation, and not wanting to knock off my own design, I got together with Ken at EMDOM USA with a new design that wasn't intended to compete with folding dump pouches. I found that I always left my RollyPoly in the unfolded configuration on my rigs, so this time around, I decided to come up with a non-folding dump pouch. Available in MultiCam of course. Design criteria - Here are some of the criteria I came up with when designing the dump pouch:
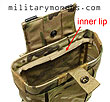
After a lot of thought, I finally came up with a design that seemed like it'd work, and presented it to Ken at EMDOM. There were some unknowns, so we had a prototype made and took it from there. Over the next six months, we tweaked the design and dimensions, while I tested each revised prototype out at the range, running around, until we ended up with the final result. Here it is: Key Features of the EMDOM/MM Dump Pouch:
|
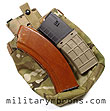
Sizing - The EMDOM/MM Dump Pouch is sized to accomodate AK and M4 mags. It's tall enough so that AK mags placed vertically are retained by the half cover. The dump pouch can hold up to six AK mags and seven M4 mags. Of course, this is when the mags are placed inside neatly. We all know that under actual use, they go in at all sorts of angles and positions, so the capacity will definitely be reduced. The dual expansion pleats help with this issue, though. Range testing - Over the past six months, I used the various prototypes of the EMDOM/MM Dump Pouch at the range during various drills which required running and shooting from various positions. Not once did I have anything fall out of the dump pouches, although I'm sure that there will be circumstances under which an item might get out. I wore it with 2" wide duty belts, mounted to my STRIKE chest rig, and mounted to MOLLE belts like the Crye Blast Belt. The 3" drop opening below the belt line provided clearance between the bottom of body armour and the opening for unrestricted access. While the stiffened panel doesn't eliminate up and down bouncing of the pouch completely, it does reduce it quite a bit. Lateral side-side swaying of the pouch is greatly reduced. I didn't find it to get in the way in any position as the stiffened panel only extends 5" below the mounting location. When I sat down, the pouch body just compressed/flattened. Having a semi-rigid opening helps when inserting mags into the pouch. The half-cover opening was easy to find and insert mags into. Shown below are the different prototypes I tried (including a single-pleat version) as well as the final production version. As far as non-folding, dedicated dump pouches go, I'm happy to say that it works as designed.
|
 |
 |
EMDOM-MM MultiCam Omega Mesh Dump Pouch
| 9/21/13 - The EMDOM USA/MM Dump Pouch is now available in Crye MultiCam OMEGA mesh fabric. In addition, a snap has been added to fold it up in half. All features of the Omega Mesh Dump Pouch are the same as that of the standard dump pouch (see above writeup for details), but an additional snap has been added on the bottom so that it can be folded up in half. The MOLLE grid on the back panel utilizes 7/8" webbing for easier weaving of Malice clips. The rest of the dump pouch's construction is 500D Cordura. Crye's 100% polyester mesh is used on the AirFrame helmet cover and Nightcap, as well as ghillie suits, vests and vehicle covers. OMEGA combines a high tear strength matrix with the ability to support and/or conceal almost any object.
|
Notes/Observations - The user needs to determine whether the mesh vs. the solid fabric version will best suit his needs. Mesh allows water to drain quickly and sand to fall out of its holes, but also allows it to get in. A dump pouch is an open top pouch anyway, so it's not sealed from debris falling in. The additional snap keeps the pouch folded up in half - not as compact as a true folding pouch due to the stiffening panel, but the stiffening panel is an integral part of the support for the pouch; to reduce flopping and movement when full. The stiffening panel doesn't extend below the butt, so it just sits flat against the body when seated in a vehicle. The stiffening 'ring' around the opening will just scrunch flat as well. At the range, the Mesh dump pouch functions exactly like the solid fabric one - I use it for empty mags, a water bottle, a spare pocket for gloves etc. If you're in the habit of picking up empty shotgun hulls or cases for reloading and dumping them into a pouch, the mesh will allow sand to fall out, so that you can shake it a bit and when you extract the empties they'll have less sand in them. The EMDOM Omega Mesh dump pouch doesn't replace the standard Cordura MultiCam dump pouch, it's offered in addition to it.
|
| 6/18/08 - These are the EMDOM USA/MM Battle Suspenders - a project that has been in work and development since the end of 2006. I'm always looking to improve upon existing designs, and while I was collaborating with EMDOM on other projects I saw elements of EMDOM's other products that I felt could be used to create a pretty good suspender, so Ken and I put our heads together on this one as well. The goal of this project was to make the best, most comfortable set of suspenders that we could, for pistol/combat belts that would be comfortable and low profile for under armour. I wanted more comfort than webbing-only suspenders while remaining less bulky than a fully padded harnesses/LBE. I also wanted it to be comfortable with heavier loads, simplify the attachment method, use lower profile hardware and eliminate the possibility of the shoulder straps slipping off the shoulders. Key Features -
|
Sizing - The EMDOM Suspenders come in two sizes: S/M and L/XL. On the S/M, the front and back 1" straps are 24" long and the shoulder pads are 18" long (see pic below for clarification). On the L/XL suspenders, the front and back straps are 32" long and the shoulder pads are 21" long. Here are some recommended notes on sizing: S/M - Fits up to 5' 8" in height, with a rigger belt. If you're wrapping the strap around a very wide 4" or more wide MOLLE belt instead of attaching it to a D-ring or PALS strap, the L/XL size is recommended. Excess strap can be cut off or just routed a couple of times through the metal sliders. L/XL - will fit 5' 8" and above. The straps are supplied extra long, so any excess can be cut off. This size should accomodate most people with any kind of belt - conventional or MOLLE. These sizing recommendations are meant as a guide; use a tape measure and measure your exact setup if you're in doubt, or in-between sizes. Allow and inch and a half at each end for securing the ends through the metal sliders. Adjustment - The Battle Suspenders are meant to be pre-adjusted, then worn; not adjusted on the fly. The Suspenders are attached to the belt, using only the lower metal sliders so they can be adjusted easily. The upper ones are left in place. The strap can either wrap around the entire belt, or attach to D-rings if provided. The length of each strap is adjusted for support the belt equally. The sternum and upper back straps are then moved up or down in their slots depending on the user's preference. I prefer the sternum strap on the upper part of my chest and the upper back strap just below my neck. The rear strap usually ends up above the neckline of body armour. The width of the sternum and upper back straps are adjusted just so the shoulder pads don't fall off on the shoulders - there doesn't need to be any tension in the straps pulling the shoulder straps together. After all the adjustments are complete, the loose strap ends are routed through the upper metal slides, and back down to the lower metal slides if there's a lot of excess. The upper metal slides can be positioned at any height - whatever is needed to take up the loose ends, illustrated below: Since late 2006, I've been using the different iterations of the prototypes - each time refining the design here and there until the production version was finalized. The idea of elastic was eliminated early on as it was found to be unnecessary, as tension on the straps to keep them on the shoulders wasn't needed. Bending or squatting down didn't affect the position of the belt. Without elastic, the suspenders distributed the load better between the hips and the shoulders with no sagging of the belt and less shifting of the load. There was also a consistent distribution of load between the shoulders and the hips without elastic, as elastic stretches the more you load it up and the length changes. The Battle Suspenders worked very well during the activities I wore them for (shooting and running around on a range). I didn't feel any restriction of movement or discomfort, and they stayed put on my shoulders. The Drilex padding on the shoulders were instrumental in adding comfort. I also wore them under a plate carrier and they're practically unnoticeable. The sternum and rear straps don't interfere with vests or plate carriers, nor can I feel the rivet in the middle of the X. I used the suspenders with a few different setups. One with an Original SOE Cobra belt with EMDOM 6o4 pouch, MM Dump pouch and handgun, and also heavier loadouts with the Crye Blast belt and SOE Tapered War Belt Sleeve shown below. I wore these under a DBT FAPC and BH STRIKE rig and they were comfortable under both. We also sent out a set more than a year ago to a beta tester and received very positive feedback (thanks - you know who you are). It unfortunately took longer than expected, with other projects in the works, but they're finally here and I'm very pleased with how they turned out. The manufacturing cost due to labour time on these is higher than most other suspenders - much of it coming from the fabrication of the shoulder straps. Instead of simply cutting some webbing to length, the shoulder straps need to be cut to shape, the Drilex cut and sewn, and the 1" webbing bartacked. The other small details add up, like the velcro belt keepers made from scratch, and assembly of the sternum and rear straps. But, the goal was to make the best suspenders we could, not the cheapest, and I do feel that the extra expense was worth it for the comfort and utility they provide.
|
| 11/4/09 - The EMDOM USA-MM CM Belt is a duty/load bearing belt designed to be used in conjunction with the EMDOM Battle Suspenders or as a stand-alone duty belt. It is low profile, light weight yet rigid, and available in 7 different colours. 'CM' stands for 'Cingulum Militare', which is Latin for the military belt that the warriors of ancient Rome hung their sword and dagger from. The EMDOM CM belt stemmed from a desire to make a MultiCam duty belt that was compatible with MOLLE or pouches and holsters designed for 2" belts. Not a rigger's belt, mind you - just a duty belt. We also wanted to supplement the Battle Suspenders with a belt that worked well with them. I've found that when worn with suspenders, a padded belt or belt sleeve isn't always necessary, and that a light weight rigid belt can still be very comfortable, but with less bulk. Design criteria:
After a few prototypes and testing at the range over the past year and a half, the final version is shown here. Key Features of the EMDOM-MM CM Belt:
|
Notes - As I mentioned above, the CM Belt was intended both for use with the EMDOM-MM Battle suspenders (or any other suitable brand) or by itself. However, even with a minimal load of a holster, pistol mags and dump pouch, I find it more comfortable to use the suspenders. This way, the weight is distributed between the shoulders and the hips, plus the belt doesn't have to be adjusted as tight for fear of it slipping down. Besides stand-alone use, I've also used my CM Belt in conjunction with the Crye Blast Belt shown below. The Crye Blast belt utilizes an outer web belt, which I replaced with the CM Belt, which is stiffer and matches it perfectly. When mounting pouches to the CM Belt using malice clips, only the top two rows of webbing on the back of the pouch are used, and the malice clip is tightened to the 2nd slot. Note that when using MOLLE pouches, they will be a bit loose because the spacing is 3". The CM Belt is designed for those who want to use a combination of MOLLE, Malice or regular belt-mounted pouches. If the majority of pouches used are going to be MOLLE, then a dedicated MOLLE belt is recommended over the CM. Note that if you plan on using the CM belt with a padded belt/sleeve, a larger size might be needed. Measure the circumference of your waist with the padded sleeve to be sure. One of the problems with having a short torso is that many vests or armoured vest will be long enough to overlap or interfere with the belt that I'm wearing, especially when kneeling or bending. This was one of the reasons why I wanted a low profie duty belt instead of a padded belt, which could be too bulky at times. In the photos below, I'm wearing the CM Belt with the Diamondback/Battlelab Predator vest. The CM Belt is low profile enough to allow the Predator to overlap it in some places. The Crye CAGE Chassis, on the other hand, is designed to be short in the torso length, for use in conjunction with their armoured Blast Belt. I've been using the CM Belt over the past year and a half at the range with various setups, and I found it to work well and feel comfortable, even though it's unpadded. The suspender straps and attached pouches stay put; kept in place by the inner row of MOLLE webbing. All CM belts are custom made to order as it'd be too hard to stock all 56 combinations (seven colour options, two buckle colour options and four size options).
|
| 3/20/13 - The EMDOM USA-MM CM Belt Pad Set is designed to add comfort and versatility to the EMDOM CM Belt, but will also work with any loop velcro-lined duty belt up to 2.5" wide. 'Background - The EMDOM-MM CM (Cingulum Militare) was designed as a low profile duty belt, for stand-alone use or in conjunction with the EMDOM Battle Suspenders. As I mentioned in the CM Belt writeup above, with a minimal load of a holster, pistol mags and dump pouch, I find it more comfortable to use the suspenders. This way, the weight is distributed between the shoulders and the hips, plus the belt doesn't have to be adjusted as tight for fear of it slipping down. However, I noticed that most people use the CM Belt by itself without suspenders, and load it up with quite a bit of stuff. When doing the same, I felt that a very thin pad would add to the comfort of the CM Belt and also help keep it planted around the waist better, so I set about designing a removable pad set. Design criteria:
After a few prototypes and testing at the range over the past year, the final version is shown here. Key Features of the EMDOM-MM CM Belt Pad Set:
|
Notes - I've been using the pads for a while and I found that using them eliminates the need for suspenders, as they're low profile and very comfortable. The pads take the 'edge' off any duty belt. The pads are installed onto the CM Belt simply by placing them inside the CM Belt; lining up the hook velcro center strip with the internal velcro on the CM Belt, and securing the ends around the belt. Note that the velcro tabs do not have to wrap around the belt; they can be attached to the inner loops on the CM Belt. That way, they don't interfere with the attachment of pouches at that location. IMPORTANT - The addition of the CM Belt Pads to a belt makes it tighter. A belt will have to be loosened about one inch, so make sure that you have that adjustability available. The CM Belt pad can also be used to accommodate bulky clothing. When worn over regular clothing, the Belt Pads are used. When worn over bulky clothing, the pads can be removed and the belt length does not have to be adjusted (depending on the clothing). With padded belts or sleeves, the main belt has to be adjusted for thick clothing wear. But, with thick clothing, the need for pads is lessened, hence the versatility of removable pads. The CM Belt Pad can also be used singly, and we found that when one belt pad is installed in the rear of the belt, it helps keep the belt from riding up the back. The center portion of the pad that is unpadded gives it more grip when worn over pant belts. The CM Belt Pad set will also work with rigger's belts or duty belts up to 2.5" wide with loop velcro lining. Many people use rigger's belts with cobra buckles as load-bearing belts, but stiff riggers belts can tend to dig into the hip bones when fully loaded up. The addition of the CM Belt Pads will greatly add to the comfort of a rigger belt setup. I don't recommend using them on belts without loop velcro lining, as they'll slide around. Anyway, if you own a CM belt, I think you'll really like the pads.
|
Safariland MOLLE Locking System and ALS Holster
| 10/25/08 - The MOLLE Locking System (MLS) is Safariland's new kit that allows the user to mount Safariland duty holsters and accessories to a variety of platforms including MOLLE webbing. With the MLS, you can move holsters and accessories quickly and easily from one platform to another via a quick-release mounting system. MOLLE Locking System - The MLS Kit shown here in flat dark earth (FDE), is part number MOLLE-KIT1-55. It consists of the holster mount (6004-15), accessory mount (6004-16), standard receiver plate (6004-17) and the receiver plate with guard (6004-18). Mounting hardware and hex key are included in the kit. It is fully ambidextrous. MOLLE Holster and Accessory mounts - The MOLLE holster mount attaches to any Safariland Duty holster with three-hole screw mounting pattern. Holsters can be mounted straight up and down or at a 45° angle to the holster mount. The accessory mount has a 1-1/2" inch, two-hole pattern that matches the mounting screw locations on many Safariland accessories suchs as mag cases, flashlight cases and handcuff cases. The holster mount takes up 2 columns and 3 rows of MOLLE space, although it only requires two rows to mount. The accessory mount uses and occupies 2 columns and 2 rows. The mounts are attached to MOLLE webbing as shown in the photo below. The 'barbs' of the outer locking tabs emerge under the bottom row of webbing and lock the mount to the webbing, preventing it from being pulled out. The inner tines go over the first row of webbing then under the bottom row. The outer forks are squeezed together to remove the mount while pulling upward on the holster or accessory. The MOLLE mounts are all that's needed to mount a holster or accessory to MOLLE webbing. Receiver Plates - Two receiver plates
come with the kit; the standard and the plate with guard. The plate
with guard has an extra protrusion at the bottom which protects the
forks of the MOLLE mounts and prevents them from being pushed up.
The MOLLE mounts slide and click into the receiver mounts.
|
ALS holsters - Safariland's ALS (Automatic Locking System) is an internal locking device in the holster that secures the weapon upon re-holstering. It prevents removal of the weapon until activated. The ALS locks into the ejection port and is operated by the thumb when the shooting grip is obtained on the weapon. It's that small black tab at the inside top of the holsters you see below. I think it's the best system I've come across. No straps or hoods to unsnap or rotate. Just a quick rearward press of the thumb on the black tab releases the weapon for a smooth draw. Since it's located at the top inside of the holster, there's nothing to snag, and it's well protected. The 6305 seen below for the govt .45 has both the ALS and the SLS rotating hood providing two levels of retention. The SLS hood can be rotated out of the way and the handgun will still be secured in the 6305 by the ALS. The 6378 ALS paddle holster in FDE is also shown below, for the Glock 19. For this writeup, I specifically picked a holster for the Glock 19 for the purposes of attaching it to a MOLLE vest. The Glock 19 is compact and light, making it a good size for vest mounting, especially for a smaller guy like me.
|
|
To convert the 6378 to be utilize the MOLLE Locking System, the paddle was removed, and the MOLLE holster mount attached with the three screws. The three screws fit into the slotted holes on the mount, which allow some cant adjustment. With the MOLLE mount attached, the holster could now be used with the leg shroud to which the receiver plate had been attached, or directly to a MOLLE vest. Utilizing the MLS instead of attaching the holster directly to the leg shroud moves the holster outboard about 0.5".
|
|
I attached the Standard receiver plate to the paddle I had removed from the 6378, so the holster could be used with both the leg shroud and paddle. It's easily switched between them in seconds, plus it mounts to a MOLLE vest or belt. The holster with holster mount is shown below mounted to a MOLLE vest. It's very secure and stable. This is much more low profile and easy to use than the older MOLLE plate adapter that Safariland originally offered. The ALS holster provides retention without any more bulk than a standard molded kydex holster. The combination of an ALS holster and MLS is a low profile and secure way to carry a handgun on a vest. The MLS and 6378 shown here are available from Safariland Dealers like Belsco Inc., where mine came from. The Safariland online catalog didn't even list an FDE option for either the holster or MLS, but Erik at Belsco (erikb@belsco.com) who is familiar with the Safariland part code system and was able to figure out the part number and order one for me.
|
| 8/9/08 - CTOMS (Canadian Tactical & Operational Medical Solutions, Inc) is a company dedicated to providing training and equipment for the medic and soldier, LE officer and paramedic, SAR technician, first responder and health care professionals that go into harms way and those that provide medical care in remote and dangerous places. Besides specialized tactical medicine equipment, CTOMS also makes Rescue and Extrication equipment, like their X-Belt™ PS featured here, which might be the most technical battle belt I've seen yet. The X-Belt PS (Padding System) consists of CTOMS's X-Belt QR, padded molle sections, and removable suspenders. X-Belt QR - At first glance, the X-Belt
QR (Quick Release) might look like a traditional riggers belt, but
a closer examination reveals some differences. Instead of being lined
with loop velcro on the inside, the X-Belt QR is instead covered completely
with loop velcro on the outside, to adhere to a duty belt placed over
it. It has the familiar V-ring loop secured by a velcro tab at the
front of the belt, with a notable exception - it's sewn to a 3"
extension which 'pops out' and extends the V-ring from the belt to
clear load bearing equipment, body armour or other equipment that
might otherwise hamper access to the V-ring. In addition to the velcro
tab that goes through the V-ring to secure it to the belt, the extension
also has velcro on the back side to 'quick secure' it flat to the
belt.
|
|
Padding System - Now this is a pretty unique design. The X-Belt PS padding system is not just a sleeve through which the X-Belt QR (inner belt) is threaded through. It's actually made up of four separate pieces. Due to the photos on my site being used as a reference by overseas manufacturers who steal other people's designs/intellectual property and sell the counterfeit gear on rip-off sites, I have decided not to illustrate the design in too much detail here. Sorry to those who want to see more detailed photos, but I do want to protect unique designs as much as possible. Fight the rip-off gear manufacturers by not buying their products. Side panels/pads (2) - The two side pads wrap around
the hips at the front and extend around to the small of the back.
They are fully padded and are lined with a wicking mesh material which
looks like Drilex. A rigid plastic stiffening insert is sandwiched
between the X-Belt QR and pad to prevent any buckling or sagging of
the belt under load. The center stitch also prevents rolling and slipping
of the pad relative to the X-Belt QR or outer portion and creates
a small 'breathing channel'. Normally, padded belt sleeves have a
channel where the inner belt goes through, with the outer portion
sewn down at the top and bottom, with some openings on the bottom
for attaching stuff to the inner belt. The X-Belt PS sleeve is completely
open at the bottom, and the outer portion is more of a 'flap' than
a 'sleeve'. The outer portion folds over the inner belt, leaving it
open at the bottom so you're not restricted to a single place along
the inner belt to hang a load from. The inner belt is threaded through
some belt loops sewn to the pad, which has a single row of molle webbing
at the bottom. The outer 'flap' secures to the pad with velcro and
a snap tab at the front of the belt. The outer flap has 10 columns
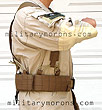
and 3 rows of molle webbing on it. Rear panel - The rear panel is non-padded, and overlaps and connects the two side panels in the rear. At each end of the rear panel is a molle connector, which secures the ends to the side panels. The rear panel can be attached anywhere along the molle webbing on the side panels, thus providing girth adjustability. The inner belt runs through two belt loops on the inside of the rear panel. There are 12 columns of 3 rows of molle webbing on the rear panel. Also on the rear panel are four suspender attach points, the two rear with D-rings. Rear pad - The rear pad slides over the inner belt and is centered between the two side pads. The pad is lined with non-slip material. Suspenders - There are eight attach points on the X-Belt PS for suspenders; four of them have plastic D-rings. The others are webbing loops. Why so many? To better support a loaded belt. Eight support points provide a more even load distribution than four. The suspenders have only four straps, so this is accomplished by elastic shock cord between the attach points. The suspenders themselves are constructed completely of webbing and have no adjustability; ending in loops at the ends of the straps. The shock cord passes through the end loops and the suspender straps end up somewhere in-between each attach point. I like the idea of a more evenly supported belt, but I feel that the elastic shock cord isn't the best solution, the way it's set up like this. The elastic shock cords provide the only means of adjusting the length of the straps. A tall person will have much longer shock cord loops than a short person. As the length of the shock cord changes, so does the amount it stretches. Shorter lengths stretch less. To adjust the suspenders, you have to adjust the length of the shock cord. Being a short person, I had a lot of excess shock cord left sticking out, so I cut it off. This means that I cannot lengthen the straps once adjusted, unless I leave some excess sticking out. Adjustments requiring loosening and re-tightening the shock cord. I'd like to see the main adjustability incorporated into the suspender straps with triglides instead of relying on the shock cord only (I've mentioned this to CTOMS). One of the issues I've had with too much elastic on suspenders is that the more load you add, the more the elastic stretches. So, it's not a consistent distribution of weight between the shoulders and the hips. Granted, elastic on the rear may help prevent the belt from riding up when bending down, sitting or squatting, but suspenders are designed to offload weight when your'e standing up, and should be optimized as such. This is just my personal preference/opinion, and once adjusted, the CTOMS suspender setup might work just fine for others.
|
 |
|
With EMDOM-MM Battle Suspenders - I decided to put one of my own EMDOM-MM Battle Suspenders on the X-Belt PS, as I wanted the adjustability and wanted to eliminate the elastic in the front. Instead of attaching the front suspender straps directly to the front D-ring, I retained both attach points and replaced the elastic with 550 cord instead, then attached the front straps to the 550 cord. I shortened the rear elastic shock cords to firm it up a bit, and attached the rear straps to them. I used siamese slik clips to attach an EMDOM H2O Hydration carrier to the suspenders, giving me a great range rig for hot summer days.
|
 |
|
The workmanship and quality of the X-Belt PS is excellent,
and it's actually manufactured in the U.S. for CTOMS. I find it very
comfortable, whether I'm standing, moving or kneeling/squatting, as
it's only 3 rows of molle webbing tall. It's streamlined enough not
to dig into your sides or belly as some wider belts can. The CTOMS X-Belt
PS is a great choice for those wanting a first line molle platform duty
belt with rescue and extrication capability built in.
|
Crosstac D-Belt Urban Tactical Belt
| 3/28/08 - If you want an every day wear web belt to hold up your pants that is stiffer than a thin BDU web belt, but don't need the thickness or features of a riggers belt, the D-Belt Urban Tactical Belt from Crosstac might be your answer. The D-Belt is somewhere in-between the two, providing enough support and stiffness for carrying a concealed weapon or other EDC items on your waist. The D-Belt uses Mil-spec Type 7R 1.75" wide webbing for the outer layer and is available in tan/khaki (they call it coyote), black and foliage green. It gets its stiffness from a polyethylene insert that prevents rollover from heavy items, but is thin enough to flex and contour to your body and not feel like you're wearing a piece of cardboard around your waist. The poly insert has a scalloped "D" shaped cutout in the back on the top of the belt (curved side down - red shaded area in the photo below), which creates a crush area in the top area of the belt against the loop at the small of the back and eliminates the bowing in and out of the belt in the middle of your back that many vertically stiff belts suffer from. The belt won't bow out and catch on stuff or bow inwards and poke you in the back. The insert is sandwiched between the outer webbing and the inner black webbing/lining (Mil-spec Type 12U 1.75" webbing) for comfort. The main portion of the belt is less than 1/8" thick, and I found it perfectly compatible with different kydex holster clips I had, which a riggers belt was too thick for. The D-Belt utilizes a dark grey Bourdon Forge buckle for infinite adjustability (which some prefer over pre-spaced holes in the belt). Note that while the D-Belt is solidly built, it's not meant to be used as a safety belt or attach point, like a riggers belt. The belt tongue (loose end) is secured with velcro, and is angle-cut so it's easier to thread and less likely to catch on clothing or your hand brushing by. The tongue also has 'speed bumps' - vertical stitches which are meant to prevent the tongue from unthreading through the buckle when taking your pants on and off. I found these weren't needed, actually; the patch of velcro on the tongue is more effective and stops the tongue from passing through the buckle. It's something to consider if you're in a public restroom loosening your pants to go 'number 2' and the loose end of your belt slides off a loop, dumping your cell phone or pager (or heavier metallic item) on the ground. I've actually been using a D-Belt since last September, when Crosstac was still working out the sizing details, which included the length of the tongue, velcro etc. It's not as easy as it may seem, and each size has to be proportionally adjusted (it's not just a matter of making the main portion shorter). One belt had too short a tongue and didn't engage the velcro patch and the other had too long a tongue (which made it extend too far along the side). The latest belt I was sent is spot on, I'm happy to report. It's available in five sizes which fit a range of waist measurements. The sizes are a bit confusing, as they run from XS to XL, but don't correspond with BDU/trouser sizing. I'm a medium in my pant size, but an XS in the D-belt. I've asked them to simply mark the belts with the range of waist sizes they fit (33"-35" etc) instead of 'XS' for example, so we'll see what happens. The measurement is based off your true waist size over your pants, not your pant size. So, for the past 6 months I've been using the first version I got (only difference was length), and it's a very comfortable belt. I like the added stiffness even if I'm not carrying anything on it because it just seems to support my pants better than a plain thin web BDU belt. I also tried it out with a full size 1911 and two mags on the opposite side, and didn't have any complaints about it at all, for the few times I wore it. Quality and stitching is excellent. So, if you're looking for such an in-between belt, the D-Belt is one to consider.
|
Original SOE Gear Trouser Belts
| 12/31/07 - Another item from John Willis, the original owner of SOE (Special Operation Equipment) and owner of Original SOE Gear is the Trouser Belt. The Trouser Belt is an excellent daily belt or travel belt due to its metal-free construction. The Trouser belt is available in plain colours, or with camouflage wrap (MultiCam shown here), and in two variants. The Trouser belts come in even waist sizes, and are 1.5" wide. Instead of a buckle, there's a single ITW triglide. The belt end has to be threaded through the triglide each time. When donning or doffing there's actually enough length to leave it on the pants and not unthread the end through the triglide every time. A length of velcro is sewn to the end and to the belt to secure the loose end. The other variant has a hidden zipper compartment on the inside of the belt - meant to be used as a money belt. It will hold folded bills or pieces of paper in the compartment. Just a very simple, low profile, practical trouser belt with the typical OSOE bomb-proof construction. Note: Some customers contacted me in the past concerning issues with backordered items from OSOE. OSOE is not taking individual orders anymore and is directing customers to purchase from their network of dealers. To avoid any delays in orders, it's a good idea to verify with the dealer that items are in stock.
|
Original SOE Gear Riggers Belts
| 12/10/06 - John Willis, the original owner of SOE (Special Operation Equipment) is back to doing what he does best - making bomb-proof, overbuilt nylon gear. His new company is Original SOE Gear and he's been busy doing custom work. One thing that hasn't changed is the attention to detail, quality and workmanship that customers of the original SOE were used to. MultiCam Riggers Belt - John put together this Crye MultiCam Rigger belt, for those who really can't live without a perfectly matching belt for their Crye MultiCams pants. He took 1000D MultiCam Cordura and wrapped it around the 1.75" Type 7R MIL-W-4088 webbing. It's a fully functional Riggers belt, and has a forged steel camlock buckle and parachute hardware V-ring attach point. While I've never used a rigger's belt for rappelling, I've used one of John's original SOE belts for years, occasionally as a safety line hookup when working at heights, and also as a pistol belt. It's lined inside with loop velcro and the V-ring retaining tab is made out of MultiCam cordura. As you can see below, it's a perfect match for the Crye pants. |
Quick-Release Riggers Belt - The only drawback to riggers belts is that to undo them, you've got to unthread the loose end through the buckle. More of a matter of inconvenience than anything else. I bought a couple of Austrialpin Cobra quick release buckles from Paragear - they're typically used for para/hang gliding and are the slickest looking buckles out there. They're available in anodized tan and green. Not cheap at $30 per buckle, but unique-looking and very functional. They require both latches to be depressed before releasing and will not release even if one latch has been pressed. I sent them to John, and he made up these two riggers belts. I asked John to make the tan one without the steel V-ring. Just a simple, stiff, shooter's belt. The OD Green has the V-ring. Both are lined with loop velcro and are of double-thickness 1.75" wide type 7R webbing. The section that goes through the Cobra buckles is a single thickness of webbing as a double thickness won't go through the Cobra buckle.
|
| Shown below are the Cobra belts worn. Note that the buckle won't pass through most belt loops, so the male buckle is removed from the loose end of the belt, the loose end threaded through the belt loops (like a regular riggers belt) and the buckle re-attached. But once adjusted, you don't have to unthread and re-adjust the belt everytime you drop your pants or put them back on. John liked the buckles so much and got overwhelming response from the people he showed the belts to that he now keeps buckles in stock and offers his riggers belts with them as an option for about $60 per belt. They can be set up any way you want - with or without V-ring. John's contact info is on his website, so give him a holler if you want one (or two). Note: Some customers contacted me in the past concerning issues with backordered items from OSOE. OSOE is not taking individual orders anymore and is directing customers to purchase from their network of dealers. To avoid any delays in orders, it's a good idea to verify with the dealer that items are in stock.
|
OSOE 4 to 3 Row Tapered War Belt Sleeve
| 2/22/08 - Here is Original SOE Gear's Tapered War Belt Sleeve, which is a padded MOLLE belt sleeve. Last year, John Willis sent me one of his Modular War Belt sleeves, shown below in the far left photo. It's a sleeve for use over a rigger's or duty belt that provides MOLLE webbing for pouches and padding for comfort. It has four rows of MOLLE/PALS webbing and is internally lined with velcro to interface with an inner belt. However, at 5.5" tall for its entire length, it was better suited to taller guys than me. I'm only 5' 7" with a short torso, and the width of the belt got in the way of my mobility when kneeling, squatting, bending at the waist etc. A taller, bigger guy would probably have no issues. I told John "y'know, I'm just too short to use it" and he asked me what I'd like to see in a lower profile war belt sleeve. This is the feedback I sent John: A little while later, a War belt sleeve showed up exactly as I had imagined and requested. That's the thing about John - he'll make exaclty what you want and do a great job at it. Here's the rundown of the new 4 to 3 row Tapered War Belt Sleeve:
|
|
I used my OSOE Cobra rigger's belt with the Tapered War Belt Sleeve, and I think that a belt with some kind of buckle in front should be used. If a regular riggers belt is used, you'd have to find somewhere to engage and tuck the loose end of the belt, which is difficult because the belt sleeve covers pretty much everything but the buckle. The Tapered sleeve works exactly as I had imagined. The lower profile gives me full range of motion and it's still wide/thick enough to provide padding where it's needed. I also recommend using suspenders for comfort. Personally, I like to wear the belt a bit looser around the hips (snug, but not too tight), and offload some of the weight with suspenders. The Tapered War Belt Sleeve is shown below with a selection of pouches (both MOLLE and 2" velcro strap types). I've got my MAXPEDITION MM dump pouch behind my right hip, an EMDOM 6o4 pistol mag pouch with 4 M&P mags, a small TAD Gear BC4 Batuca battery case to the right of my buckle, a TAD Gear iCOMM pouch to the left of the buckle, a home-modified TT MOLLE panel/thigh rig with a home-modified/attached Serpa holster for my M&P (it was one of the only holsters that'd fit the M&P when it first came out - I know it's got a controversial reputation but if it fails, I'll just replace it. I'm not depending on it with my life - it'll never be used anywhere but the range), and a prototype EMDOM compact digital camera case. There are still 7 columns of PALS left over in the back. The belt wears comfortably, and is a very stable platform for what I've attached to it. No sagging or pulling away from the inner belt. It's also not too bulky for a padded belt sleeve, which I like. As usual, it's overbuilt with OSOE's bomb-proof construction, and I've very happy with the way it turned out. Note: Some customers contacted me in the past concerning issues with backordered items from OSOE. OSOE is not taking individual orders anymore and is directing customers to purchase from their network of dealers. To avoid any delays in orders, it's a good idea to verify with the dealer that items are in stock.
|
Jones Tactical FatZombie Duty Belt
| 7/7/09 - The FatZombie Duty Belt from Jones Tactical is an inner/outer gun belt system that features a quick-release Cobra Buckle. It's a very stiff system, designed not to roll with leg holsters/platforms, and is custom made to the user's waist size. Inner/outer duty belt systems offer the convenience of not having to detach your holster or belt-mounted accessories to thread the belt through belt loops. Since the outer belt is secured to the inner belt with velcro, it also keeps the accessories from sliding along the belt. Description - The FatZombie duty belt consists of two belts - an inner belt and an outer one. The inner belt is made of 1-3/4" riggers webbing that goes through the belt loops on your pants. It is covered in loop velcro on the outside and the overlapping end has 6" of hook velcro to accomodate different layers of clothing. It is sized to provide some adjustability up or down in waist size. The outer belt is made of doubled over and sewn 2"
scuba webbing. The inside of the belt is lined with 1-1/2" hook
velcro, which interfaces with the loop velcro on the outside of the
inner belt. The outer belt is sized so that it overlaps at the front.
A 6" length of loop velcro is sewn to the outside of the overlapping
2" scuba webbing, and this initially secures the belt around
the waist. When worn, there are four layers of webbing - the inner belt, and the outer belt (2 layers of 2" scuba and the outermost layer of 1-3/4" webbing). Build quality is excellent, with straight stitching and no loose threads. The FatZombie belt is available in black, camo green (1-3/4" only), tan, foliage green and OD (2" only). The single-adjust Cobra buckles come in black, tan and foliage green.
|
Notes/observations - The FatZombie Duty Belt is shown below with a Safariland 007 holster, an EMDOM-MM 6o4 pistol magazine pouch (with six single-stack 1911 mags) using small Malice clips, and a Maxpedition RollyPoly dump pouch. When I was looking through my holsters, all except the 007 would only accommodate up to 1-3/4" belts. So, before you buy, make sure that your holster, mag pouches or whatever you want to mount to it can fit a 2" wide belt (or order a 1-3/4" version). It's also quite a thick belt, due to the 3 layers of webbing plus velcro. The thickness of the outer belt is about 1/4". A large Blade-Tech Tek-Lok will work on the FatZombie with a bit of coaxing.
|
|
To don the FatZombie belt, the inner belt is first threaded through the belt loops on the pants, and the overlapping ends secured in front. The outer belt is then wrapped around the waist (I find it easier to start from the back and pull both ends forward while wrapping them around to the front, for good velcro engagement between the outer and inner belts), the overlapping ends secured with velcro, then the Cobra buckle buckled. It helps to pre-adjust the loose end of the outer belt, if pouches are going to cover the loose end. Inner/outer duty belt systems have the convenience of leaving everything mounted on the outer belt and not having to thread it through the belt loops. The velcro 'sandwich' keeps everything from sliding around on the belt. The inner belt is also low profile, and more comfortable under the outer belt than a regular pants belt with buckle would be. Since they're attached, you don't have the problem of the pants or belt riding up or down relative to each other - they're always at the same level on the waist. The outer belt is initially very stiff, but broke in and conformed to my waist after a few days of wear. It didn't lose any of its lateral (rollover) stiffness and easily supports the weight of a full size 1911 plus mags. It's a well built system for duty or competition wear. Update 8/2016 - I received an email from an unhappy customer who stated that wait times were much longer than the time stated on the website and the product was not delivered after several promises to do so. Do a search on the internet for current information regarding this subject.
|
 |
| 6/23/05
- LIGER PRODUCTS
(LIGHTWEIGHT EXTREME
RESISTANT) has introduced
a new belt designed for concealed CCW or everyday wear: the LIGER
gun belt. LIGER Products is owned by Cliff Oak Inc., the parent company
of MAXPEDITION Hard-Use Gear. The LIGER belt is made from a synthetic
developed for LIGER PRODCUTS, dubbed 'Ligerthane', and is a composite
of a high-strength polyester fabric core embedded in a resin with
polyurethane coating, which makes it waterproof, mildew, rot and solvent
resistant. It has a slightly rubberized feel to it, and will not slip
on the waistband, which also aids in locating a holster or pouches.
The belt is smooth on the interior and the exterior has a 'Ligerderm™'
pattern, which gives it a look and feel of textured leather. The belt
is 1.45" wide, and is stiff along its width to prevent roll over.
The material is 1/8" thick. The attractive LIGER logo is heatstamped
on the inside near the buckle end. It's a picture of a Liger, of course,
the hybrid offspring of a male Lion and female Tiger, and the largest
non-naturally occuring member of the cat family. |
| To don the LIGER belt, you simply thread it through
the belt loops and engage any one of the holes with the buckle hook. There
is no belt guide or keeper on the back of the buckle, but the overlapped
portion doesn't seem to need it. It's unlikely the hook will accidentally
slip out of the hole - based on the tightness and angle. At 1.45",
it's not a very wide belt, but its resistance to rollover makes up for
it. It's stiff enough to support a holster mounted to the outside, and
definintely inside-the-waistband types. I compared it to a 1.5" wide
leather gun belt I have, which is also about twice the thickness in material,
and the LIGER belt is just as stiff. It's also stiffer along its width
than a rigger belt that I have. I've been wearing one for a while, and the Liger belt starts to conform more to my hips/waist. Even if you don't carry a concealed handgun, it's a very smart-looking belt for BDU, jeans or dress wear.
|
| Update 12/11/05
- LIGER PRODUCTS
has introduced the Gen II version of their LIGER gun belt buckle, as shown
below. The buckle has been smoothed/rounded out a bit, which results in
a more 'aerodynamic' look, and more pleasing aesthetically than the Gen
I version (which I thought looked fine as well). Curves have been put
on the front and back vertical edges of the buckle, with the original
corner radii kept the same (1/2" in front, 1/8" at the back).
A 1/32" chamfer has also been added all the way around on both the
front and rear edges of the buckle, making it less sharp than the original.
The belt is also offered in a new colour now - brown.
It looks just like a nice leather belt and is my new favourite colour
for casual wear with jeans. A brown belt with black buckle is dubbed the
Nightfall™.
The chamfers on the edge make it slghtly more comfortable to buckle and
unbuckle, but nothing else has really changed functionally beside the
look of the buckle. A nice refinement of the design.
|
| Update 1/28/06
- LIGER PRODUCTS
has added the Army's Foliage Green colour to the Liger belt lineup to
match the new ACU colours. Seen below with SOF-PCU Level 5 pants. It's
a medium/dark grey-green.
|
TAD Gear Rapid Deploy Dump Pods
| 5/15/08 - Another cool offering from TAD Gear is the RDDP (Rapid Deploy Dump Pod), available in two sizes: small (Sz1) and large (Sz2). Like the Maxpedition Rollypoly (MM Folding Dump Pouch), the TAD Gear RDDP is a folding dump pod/pouch meant to provide a quick means of additional storage on the belt or rig for magazines or other items at a moment's notice. However, the way it's designed and folds up is completely different from the Rollypoly (it was actually designed in part by a buddy of mine who has the initials 'MM' coincidentally). The RDDPs consist of a 420D oxford nylon dump pouch that is sewn to and enclosed by a 1000D cordura clamshell pouch with a YKK coil zipper going round the top and both sides of the clamshell. There are two zipper pulls and pulling on the pull tab at the top front of the pouch pulls the zippers apart from the top and opens the clamshell and allows the dump pouch to unfold and deploy. The dump pouch doesn't have to be folded up - it can just be scrunched up as the 420D nylon is thin enough not to be too bulky. The 420D pouch material is responsible for the very compact size of the closed RDDPs. The clamshell portion has TAD's 2TAC webbing straps
at the back for attachment to any MOLLE-compatible platform. The Sz1
pouch as a single strap and the Sz2 has two. The dimensions for the
two sizes as as follows: The dump pouch portions have a round bottom and a grommet drain hole. A single cord lock with shock cord cinches up the top opening.
|
|
I've illustrated both Sz1 and Sz2 RDDPs below mounted to my OSOE tapered war belt sleeve. You can see how compact they are closed. A tug on the pull tab is all that's needed to deploy the pouch. Takes about a second. The 420D pouch material has its pros and cons. Because of its light weight and low bulk, it enables the RDDPs to have a very compact footprint when closed. However, it's more prone to swinging and moving due to the lack of stiffness. It'll definitely accomodate empty rifle mags, but they'll bang about a bit more than a 1000D cordura dump pouch. For this reason alone, I feel that the RDDPs are suited more as an emergency dump pouch/general purpose/evidence pouch rather than a dedicated pouch for empty rifle mags. The Sz1 will fit a Nalgene water bottle and if I were going to use one of them for rifle or pistol mags (or shotgun shells), it'd be the Sz1 just because it's easy to stuff too much in the Sz2. For general purpose and lighter weight/bulky stuff, the Sz2 is great, and it'll hold quite a lot.
|
Reccegear MM Dump Pouch (no longer available)
| 8/4/03 - After using the Eagle Duty Evidence Pouch for a while (since about 2001), I felt that a lot of improvements could be made to make it specifically for retaining spent magazines (more heavy duty, less flop, better flap closure, simpler method of folding, MOLLE compatible, etc) so I decided to re-design it from the ground up. Building on the concept of a fold-up pouch, I made a host of changes in features and dimensions and sent Jon Nelson from Reccegear a drawing to make it for me. We made a small tweak (added 1" to the flap to allow for thickness of material) and ended up with what's now commonly known as the RG MM dump pouch. It's constructed of 1000d cordura and has an elastic shock cord closure (like the MOLLE canteen pouch). It also has a velcro flap closure for more security, which can be secured inside the pouch. The pouch is sized for hold 7 M4 30-rnd mags, stacked either vertically or horizontally. The pouch folds up into a small 4x3.5x2" package and can be attached to a belt or PALS webbing via malice clips. Jon's workmanship is excellent. I've used it as a dump pouch or utility pouch for everything from shotgun shells to M4 magazines, pistol mags and tactical lights. Although the larger dedicated box-type dump pouches work well, I felt that they take up too much real estate on a belt or on your thigh. This one won't take up a lot of room on a belt, and doesn't swing much at all. Jon is no longer taking new orders due to time constraints. |
MAXPEDITION MM Folding Dump Pouch (Rolypolly)
MAXPEDITION is now producing my MM Folding Dump pouch as their Rollypoly - full details here.
| High Speed Gear Modular Shoulder Rig
The Modular Platform - This consists of two modular panels, a shoulder harness, chest, back, and waist straps. All the connecting straps can be disassembled either by triglides or snaps, which allow the modular panels to be mounted with the PALS webbing horizontal or vertical. At each corner of the panels is a D-ring, to which the straps attach. Behind each of the panels is a flat mesh compartment the size of the panel, with a snap closure (not shown). This is for stowing small, flat items like a map. The 1.5" wide shoulder harness crosses in the back, with a self-adjusting plastic divider keeping the 'X' in place, much like the HSGI HSLD suspenders. Keeping tension on the back strap, the chest and waist straps in front keep the rig very stable, with none of the swinging that most shoulder holsters have. The angle of the panels can also be adjusted via the straps, to sit horizontally or at a slant, if desired. Optional belt tiedowns are available on request. Modular Holster - The modular holster attaches to the panel with Malice clips. It's intended to be mounted horizontally instead of vertically, as it isn't a break-front, but it's up to the user. This one is sized to fit a Sig P226. IT's very well made and stiff with a rigid sight channel, and will not collapse, making holstering the weapon easier. The weapon is retained by an adjustable thumb break. The secondary retention visible in the photos consists of a loop of shock cord (adjusted in length by a cord-lock) that goes over the butt of the pistol, and a web strap that covers the magazine floor plate. Besides providing secondary retention for the weapon, the web strap prevents the magazine from falling out should the magazine release button be pressed by accident. As with any horizontally mounted shoulder holster, extra care should be taken during the draw to keep that finger off the trigger as a negligent discharge won't be into the ground. Modular Pouches - The MSR will accept any molle compatible pouches. Shown below are HSGI's single and dougle modular pistol magazine pouches. The double (and triple) mag pouches are connected via the PALS webbing on the back. This was designed that way so it's possible to use a heat knife to cut the webbing and seperate a triple or double mag pouch into singles if desired. The pistol mag pouches will fit 2 single stack 1911 .45 mags, a high-cap double stack mag, or an extended .45 10-rnd mag. The lid is secured with velcro and a SR buckle. A flap covers the velcro if it's not needed. The universal rifle mag pouch is just that - universal. It will hold 6 M4 mags, or 4 AK or FAL mags. I haven't come across any other universal pouches that work as well - I'll admit that I was a bit skeptical at first. There is an internal divider that staggers the inner magazine slightly higher than the one in front, for faster access. With M4 mags, you can place one or two high, and the others low, as the divider has enough slack to go either way. Elastic shock cord with adjustable tension provides retention of the mags when the lid is open. The lid can be secured with velcro for quick closure and the side-release buckle. The velcro, like the pistol mags, has a flap to disable it. PALS webbing on either side of the mag pouches provide attach points for single pistol mags pouches. My inital impression
is that this rig can be configured for quite a few different applications.
SAW ammo pouches, medical pouches, mag pouches - whatever is practical
can be used. With all the straps snugged, the rig does not move, and
is very secure. It's less apt to become unbalanced and shift like
conventional shoulder holsters, due to the chest and waist straps.
One thing I noticed is that the panels are rectangular, not square,
so turning them 90° changes the relative distance between the
chest and waist straps. Not a biggie, but the straps will then be
a a slight angle if one panel is vertical and the other horizontal.
I've suggest to Gene to make the panels square, which won't adversly
affect their function. Mounted horizontally on the weak side, the
universal rifle mag pouch is a bit bulky (for me, since I'm not a
big fella), as the mags can't follow the curvature of the body. The
lids can be tucked behind the panel, with the mags under elastic retention,
for quicker access to the mags. Mounted vertically, it does conform
better to the body, but should be mounted on the strong side or else
drawing mags out can be difficult. The pistol mag pouches are easy
to access on either the strong or weak side. Mounted under the holster
on the strong side, I attached them upside down, which worked well
to dump a mag into my hand. I find it more comfortable than carrying
an equivalent load on my belt. As I mentioned above, it can be configured
in a variety of ways for different applications. It's up to the user's
imagination to decide how it suits them best.
|
Shown below are some possible different configurations of the MSR.
SAS CRW belt kit - Paul Evers/Holsters International
|
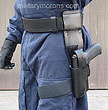
Paul Evers Holsters (marketed under Holsters International - I'll refer to it as 'HI' from now on) handcraft military and law enforcement equipment in their workshops in the UK. They have 30 years of industry experience and are well known for using only the finest English bridle leathers. HI produces a wide variety of products, including all kinds of holsters and rigs, accessories, and custom weapons carriers to fit unusual weapons. HI does not and will not name the organizations or units that it supplies equipment to for obvious reasons (they use the generic term 'Special Forces' and 'Law Enforcement'), however, looking through various SAS books and comparing them to the HI online catalog, one can plainly identify quite a few different HI products in the photos of SAS CRW and personal security teams. Model 47 Special Forces Style buckle-less 2-1/4" wide gunbelt (shown below) - Rather than the traditonal buckle, the Model 47 has a stainless steel stud which fastens through holes which are punched throughout the length of the belt. A double-snapped keeper loop secures the belt to the stud. The loose end of the belt is retained by velcro lining, which interfaces with velcro at the front of the belt, and keeper loop slides over the end. The adjustment holes down the center of the belt can be used to fit a wide range of persons, and also to secure other accessories. Model 4A Long Drop Tactical Holster - This holster, as well as the swivel version, the 10A are the ones most frequently featured in SAS books with black-clad CRW troopers assaulting buildings. The 4A I have was built to fit a SIG P226, which it does, like a glove. It has steel inserts throughout, which allow the user to adjust the inboard and outboard position of the pistol butt. The thumb break is also steel reinforced, and is secure until snapped open by the thumb. A surgical elastic leg tie down strap has a velcro closure with added 'fail safe' loop to prevent the end from accidentally opening. Since the position of the holster is fixed relative to the belt, wearing it with the leg strap slightly snug (but not too tight) will allow greater freedom of movement. HI also offers swivel holsters that move with the thigh, which might be more comfortable for intense activity. Presentation of the weapon is quick from the holster and the thumb break is easy to re-engage. Both the belt and holster are made of thick leather with a non-glossy finish. Stitching and finishing of the edges is impeccable. These items are built to last. Contact Paul if you want the real deal gear. I'd also like to thank to Clinton at ArmourIndustries in Australia for hooking me up with Paul. Update 2/18/06 - Sadly, Paul passed away in Dec, 2005. A true English gentleman and a humble and private person, RIP Paul. Update 12/1/06 - Price Western Leather acquired Holsters International and now carries their products. |
 Mod 47 SF gunbelt |
 View showing buckle-less adjustment |
 Mod 4A tactical holster |
 Rear view of 4A - surgical elastic thigh strap |
 Close-up of thumb break |
 |
 |
 |
ATTENTION! PLEASE DO NOT LINK DIRECTLY TO MY IMAGES
-
IT RESULTS IN MY BANDWIDTH ALLOCATIONS BEING EXCEEDED,
AND MY PAGES GO DOWN. THANKS!
/ . PLEASE OBSERVE AND RESPECT
OUR COPYRIGHT! . /
©opyright by MilitaryMorons.com. All Rights Reserved. Reproduction, Duplication,
Distribution Strictly Prohibited.
Unless mentioned otherwise, content and images are the property of militarymorons.com
and are not in the public domain.
They are not to be used without
permission. Please Contact
me for permission to use any images or content herein.

